Before the Program Starts
Everything you need to arrive ready to build — tools installed, mind oriented, system configured.
Choose Your Program
Select which program you're joining. This affects your Part 8 content and some setup instructions.
Your 8-Part Roadmap
Mental Model
Three distinctions that change how you think about AI
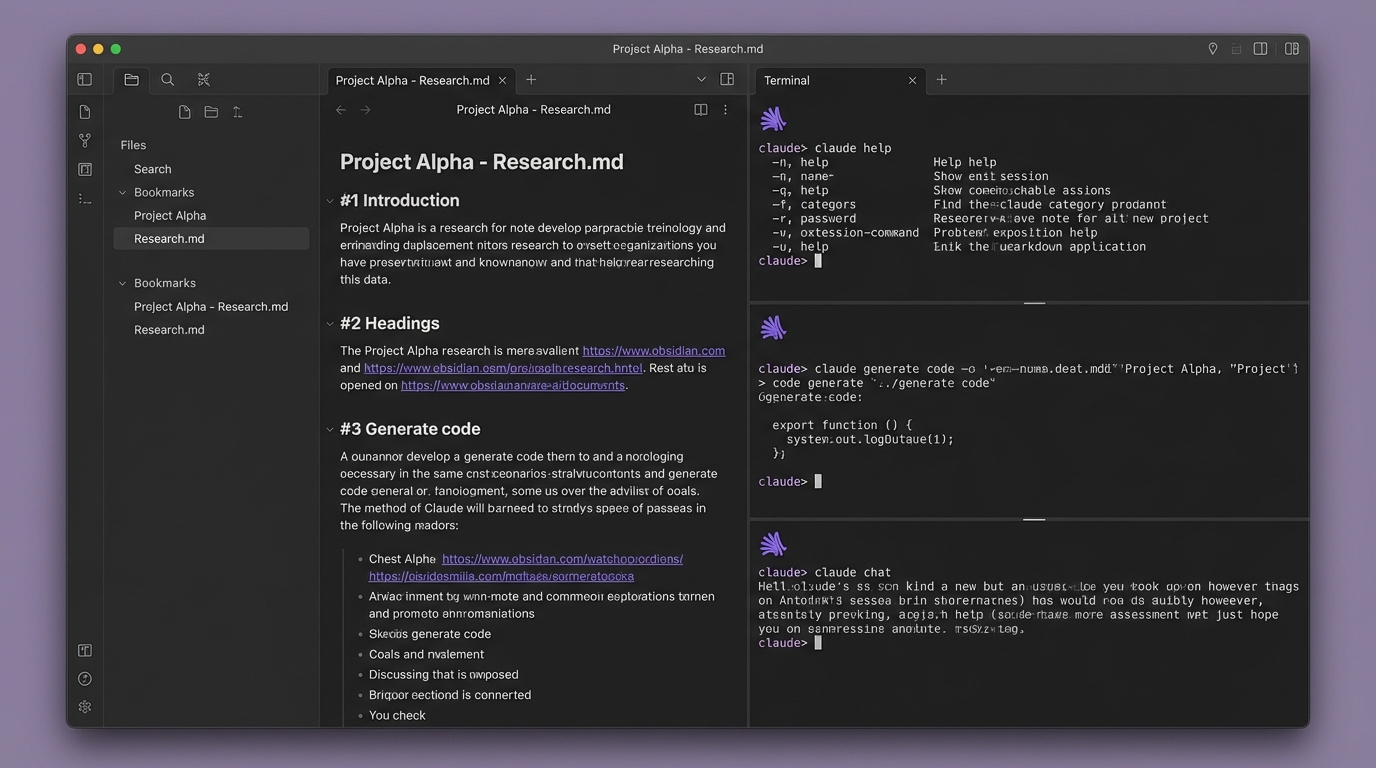
Claude Code Setup
Install the AI building tool on your computer
Obsidian Setup
Create your knowledge vault where everything lives
Integration
Connect Claude Code inside Obsidian — one workspace
Profile Interview
Claude interviews you about your business (20-30 min)
File Discovery
Find and organize your existing documents into your vault
Dossier Review
Review and approve your client dossier for the SP team
Program Prep
Final checklist and what to expect when you arrive
Before You Touch a Single Tool, Read This
Most people think they know what AI is.
They've used ChatGPT. They've typed a question, gotten an answer, maybe felt a little impressed, maybe a little underwhelmed. And they've filed it under "useful sometimes" and moved on with their life.
If that's you — good. You're in the right place. Because what you're about to learn has almost nothing to do with what you've experienced so far.
I'm going to share three distinctions with you. They're not complicated. But they will fundamentally change how you think about AI, about the tools we're going to use, and about what's actually possible when you stop chatting with AI and start building with it.
These three ideas are the reason this program exists. Get them, and everything that follows will make sense. Miss them, and you'll spend the next few weeks wondering why we're not just using ChatGPT like everyone else.
Here's What Most People Get Wrong About AI
Let me give you a number that should stop you in your tracks.
Now, ask yourself this: What is happening in the gap between the 88% and the 6%?
Because the 88% are not stupid. They've bought the tools. They've run the pilots. They've sent their people to prompt engineering workshops. And they're still stuck.
The answer is that the 88% are doing the wrong thing with AI. They're chatting with it when they should be building with it. They're optimizing the wrong layer. And they're using tools designed for conversation when they need tools designed for construction.
That's what the three distinctions below are about. Not which AI is "better." Not which tool has more features. But which mode you're operating in — because mode determines everything.
Coding CLIs vs. Chat Interfaces
Every major AI platform has two modes. Two completely different ways to use it. And almost nobody talks about the difference.
Mode one: the chat interface. ChatGPT, Claude.ai, Gemini — you open a browser, type a question, get a response. This is what 99% of people think AI is. It's useful. It's impressive. And it's the wrong mode for what we're doing.
Mode two: the coding CLI. Claude Code, OpenAI's Codex CLI, Google's Gemini CLI, and others — these tools run on your computer, inside your file system, with access to your actual projects and documents. They don't just answer questions. They read your files, edit your documents, create systems, and build things that persist after the session ends.
Every major AI company has built both. The chat interface is the one they market. The coding CLI is the one that changes how you work.
What happens the day AFTER you get the answer?
With a chat interface, you type a question, get a response, close the tab, and tomorrow you start from scratch. Every conversation is a fresh start. There's no memory of what you built yesterday. No ability to save the instructions that worked. No way to hand off what you learned to a system that keeps running without you.
A coding CLI is different. It lives on your machine. It reads your files. It edits your documents. It remembers your project context across sessions. When you build something today, it exists tomorrow. And the day after that. And the day after that.
Imagine you need to get across town every morning. A chat interface is like asking a stranger for directions each day. You get a fine answer. Maybe even a great answer. But tomorrow morning, you're asking again. A coding CLI is like building a road. The first day takes longer. But from then on, you just drive.
One approach is tool-mode: bring a task to the AI, get an answer, leave. The other is infrastructure-mode: build persistent systems that compound over time.
The entire AI industry has been selling you on something called "prompt engineering" — the art of crafting clever instructions to get better answers. And prompt engineering isn't useless. But research from some of the smartest people in AI has broken down where results actually come from:
- 15% comes from which AI model you're using
- 10% comes from the prompt — your clever instructions
- 75% comes from everything else: the context you provide, the architecture around the AI, the system design, the data, the configuration
Most AI training teaches you to optimize the 10%. The prompt. The clever question. And they ignore the 75% that actually determines whether you get real results or just impressive-sounding responses.
This program teaches the 75%.
Obsidian vs. Google Docs, Notion, Evernote
The most important decision in your AI setup is where you keep your files. Not which AI model you use. Not which subscription you buy. Where your files live.
Let me tell you how I learned this the hard way.
I was a master power user of Evernote. Loved it. Used it for everything. And then I started working seriously with AI and hit a wall almost immediately. I couldn't get my notes out of Evernote and into AI easily. I couldn't get AI's output back into Evernote easily. Every interaction required me to manually drag files in, copy results out, paste them somewhere. The tool I'd relied on for years was suddenly a bottleneck.
So I moved to Notion, hoping it would be better. And it was — a little. Notion had an integration that let AI pull files and work on them directly. But it didn't always work. Sometimes the connection failed. Sometimes files didn't sync correctly. And here's the part that really burned me: when it didn't work, I was dead in the water. There was no copy of my files on my computer. Everything lived in Notion's cloud. If the integration broke, I had nothing to work with.
I stumbled on Obsidian almost by accident. And if I'm being honest, I didn't even like it at first.
But the more I used Obsidian with AI, the more I fell in love with it.
An Obsidian vault is just a folder on your computer. Plain text files sitting on your hard drive. You own those files. They'll still be readable in fifty years.
And because those files are plain text on your computer, your coding CLI reads them directly. Your notes, your documents, your project files, your business context — the AI sees all of it, instantly, without any export, conversion, or API. Your vault IS the context.
I think one of the major reasons I'm so far ahead of most people with AI is simply that I stumbled on Obsidian early. It gave my AI long-term permanent memory before anyone else had figured that out.
A researcher named Eva Keiffenheim said we've gotten really good at capturing and organizing information. We've built beautiful digital warehouses. But we're treating these systems like warehouses when we should be treating them like forges.
Google Docs, Notion, Evernote — they're warehouses. You store information there. It sits.
Obsidian — connected to a coding CLI — is a forge. Your knowledge goes in, and the AI transforms it.
The shift is not from one note-taking app to another. It's from storing knowledge to using knowledge.
Getting an Answer vs. Building a System That Answers
This is the distinction that separates the 6% from the 88%.
And it starts with a question most people never ask: Who is the assistant?
Think about how most people use AI right now. They open a chat interface. They need AI to work on a document, so they go find the document, drag it into the chat, wait for the response, copy the output, go put it where it belongs, come back, drag in the next file, repeat.
The AI sits in one place. The human runs all over.
The AI does the thinking. The human does the fetching, the carrying, the filing, the organizing. The human is the assistant to the AI.
Now think about how it works with a coding CLI. You sit at your computer. You tell the AI what you need. The AI goes and grabs the files. It reads them. It works on them. It creates new files, organizes them, puts them where they belong, and tells you when it's done. You bark the orders. The AI does the running.
You take back your power.
That's not a small difference. That's a complete inversion of the relationship. In one mode, you serve the AI. In the other, the AI serves you.
Picture two people. Both are using AI. Both are smart. Both work hard.
Person A asks AI for answers. Each interaction is independent. Nothing carries forward. Every day starts from zero.
Person B builds a system that answers. Each session builds on the last. The system gets smarter every time they use it.
Person A's output is linear. Double the time, double the output. Stop working, output stops.
Person B's output compounds. The hundredth session is ten times faster than the first, because the system already knows everything.
Here's a real example. A guy named Alex McFarland spent about an hour building context profiles for his AI system. Then he rebranded his entire business in two days. Fifteen-plus pieces of professional content. Not because he wrote better prompts. Because he built a system that already knew him.
One hour of building replaced weeks of asking for answers.
The 88% are asking for answers. The 6% have built systems that answer.
This program teaches you to build the system.
What This Means for You
I built this system myself. I use it every day. The AI tools you're about to set up are the same ones running in my business right now. This is not theory I read in a book and decided to teach. It's infrastructure I built, tested, broke, rebuilt, and now rely on.
I'm not going to pretend the setup is effortless. There's a learning curve. You'll hit moments where you're frustrated. Here's what I've learned about those moments: you cannot learn unless you push through them. The frustration IS the learning.
A study of 667 people found that working effectively with AI is a separate skill from being good at your job. Years of experience, advanced degrees, deep expertise — none of it predicted who would get the best results from AI.
The difference was not intelligence. It was not domain expertise. It was the skill of building systems that let AI work with what you know.
That's the skill this program teaches.
What Happens Next
Part 2 is where you set up Claude Code on your computer. It's a step-by-step walkthrough — no guesswork, no assumptions about what you already know.
You don't need to be technical. You don't need to have used a terminal before. You don't need any programming experience. If you can follow instructions on a screen, you can do this.
Part 2 is the setup. But Part 1 — what you just read — is why the setup matters. The road, not the directions. The forge, not the warehouse. The system, not the answer.
You're Done When...
Installing Claude Code
Getting the Claude App
You're about to install the tool we'll use throughout the rest of this program. This is the single most important setup step. Everything else builds on this.
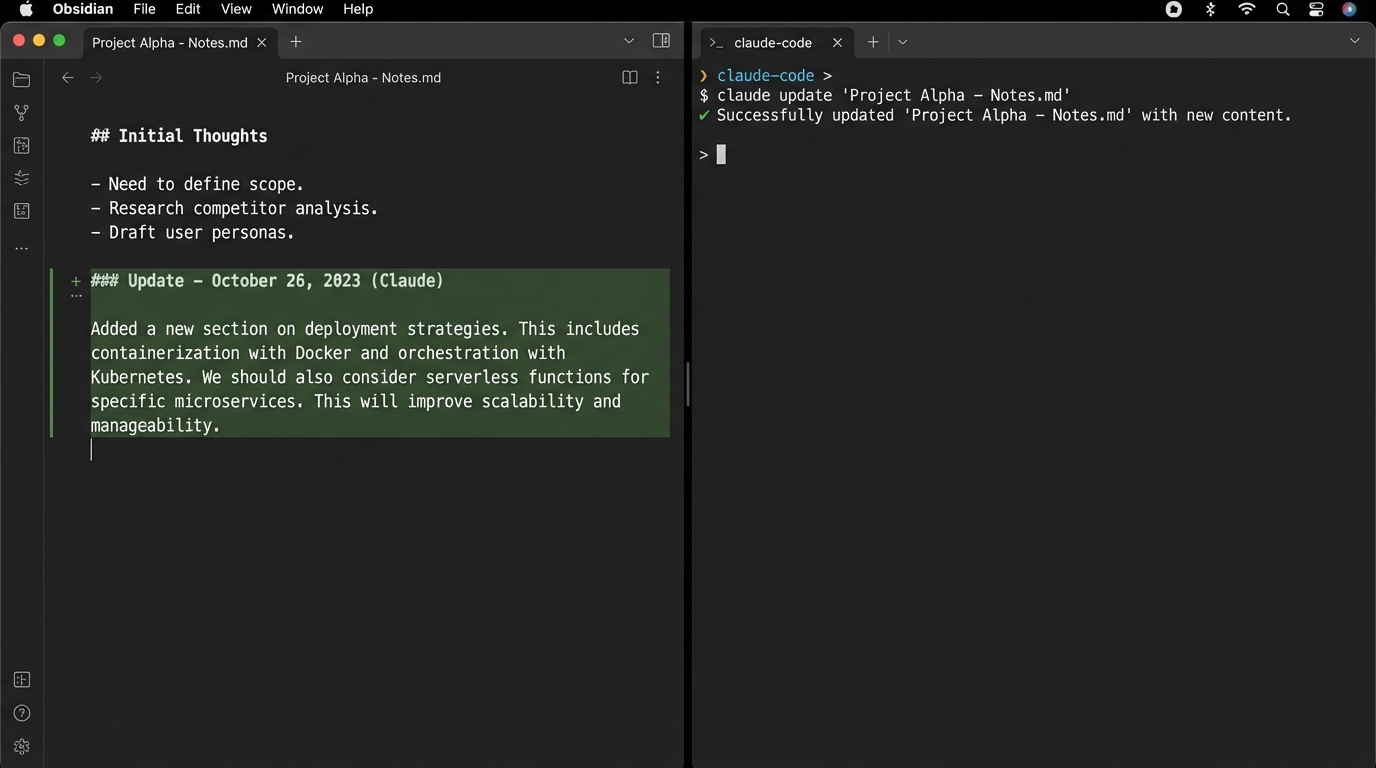
In Part 1, I talked about the difference between chatting with AI and building with AI. ChatGPT is chatting. Claude Code is building. It lives on your computer. It reads your files. It creates things. It remembers your project from session to session.
Right now, none of that matters. Right now, all that matters is getting it installed and running. Just follow the steps.
What You're Looking At: The Terminal
A terminal is a text-based way to talk to your computer. Instead of clicking icons, you type commands. It looks intimidating. It isn't. You'll type exactly what I tell you to type.
How to open it:
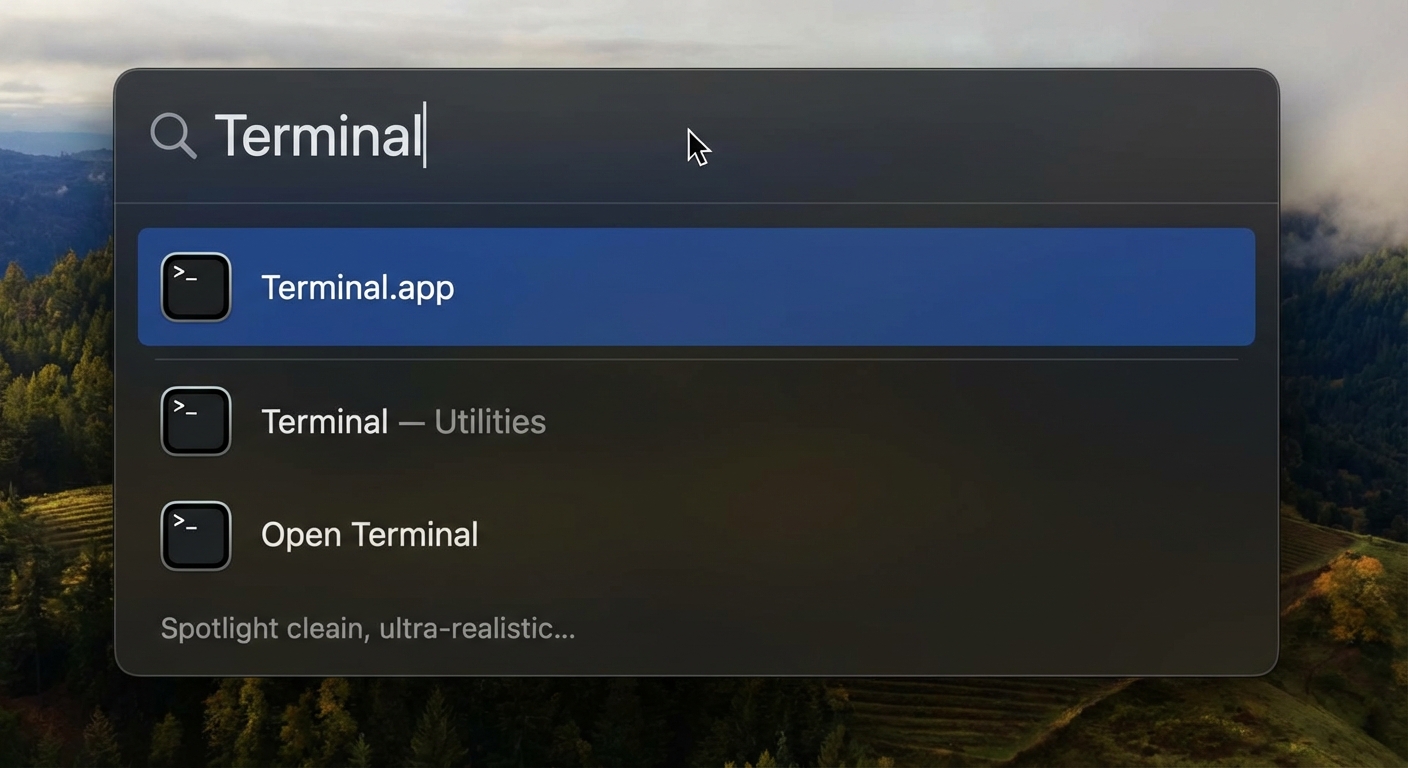
Press Cmd + Space to open Spotlight Search. Type Terminal. Press Enter.
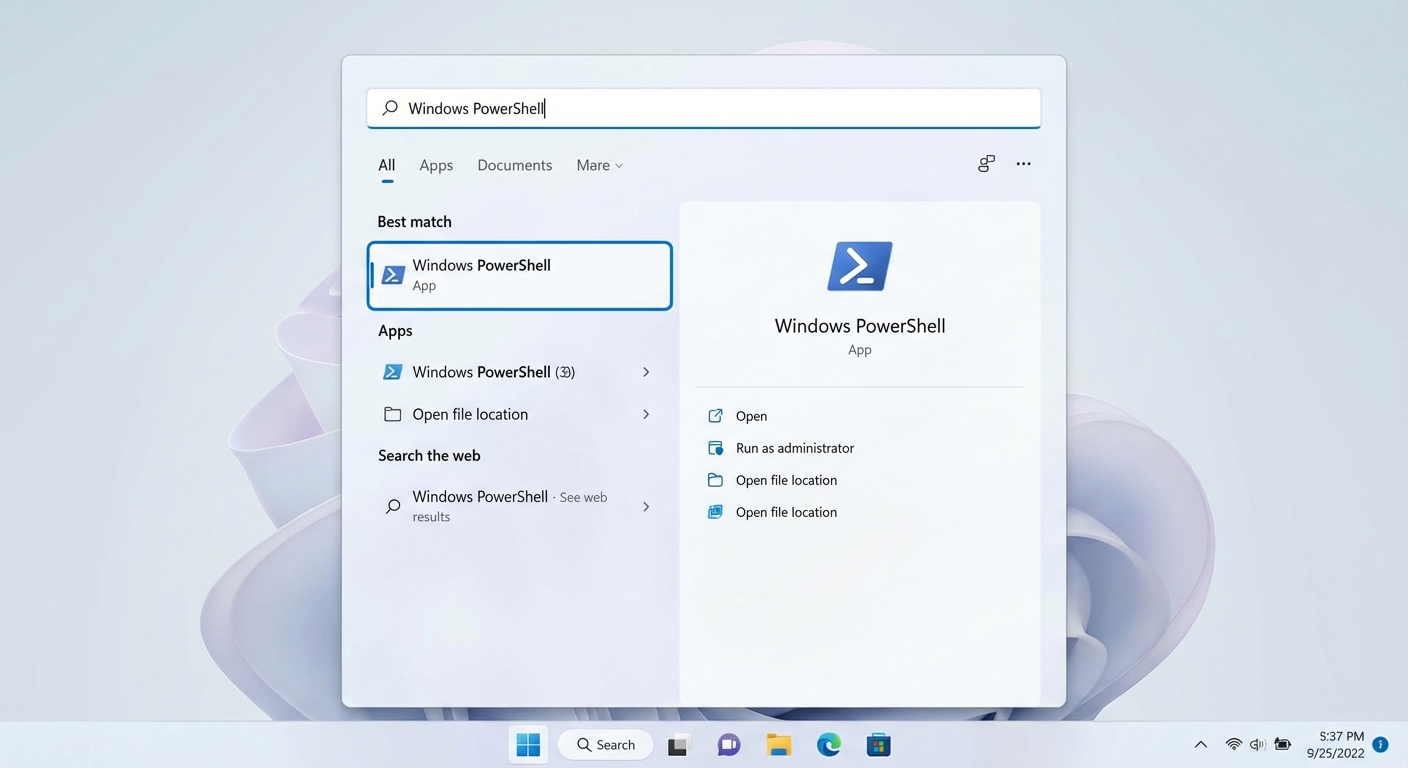
Click the Start button (or press the Windows key). Type PowerShell. Click "Windows PowerShell" when it appears.
That blinking cursor is where you'll type commands. When I show you a command in this guide, type it exactly as written and press Enter.
Step 1: Open The Terminal
If you haven't already, open your Terminal. Press Cmd + Space to open Spotlight, type Terminal, and press Enter.
PC users will need to install three things in order for Claude Code to work properly. It will take no longer than 15 minutes. You'll need Node.js, Python 3.14, and Git. The links to install each one are below.
Please complete this step before moving forward:
Once those are installed, open PowerShell. Click the Start button (or press the Windows key), type PowerShell, and click "Windows PowerShell."
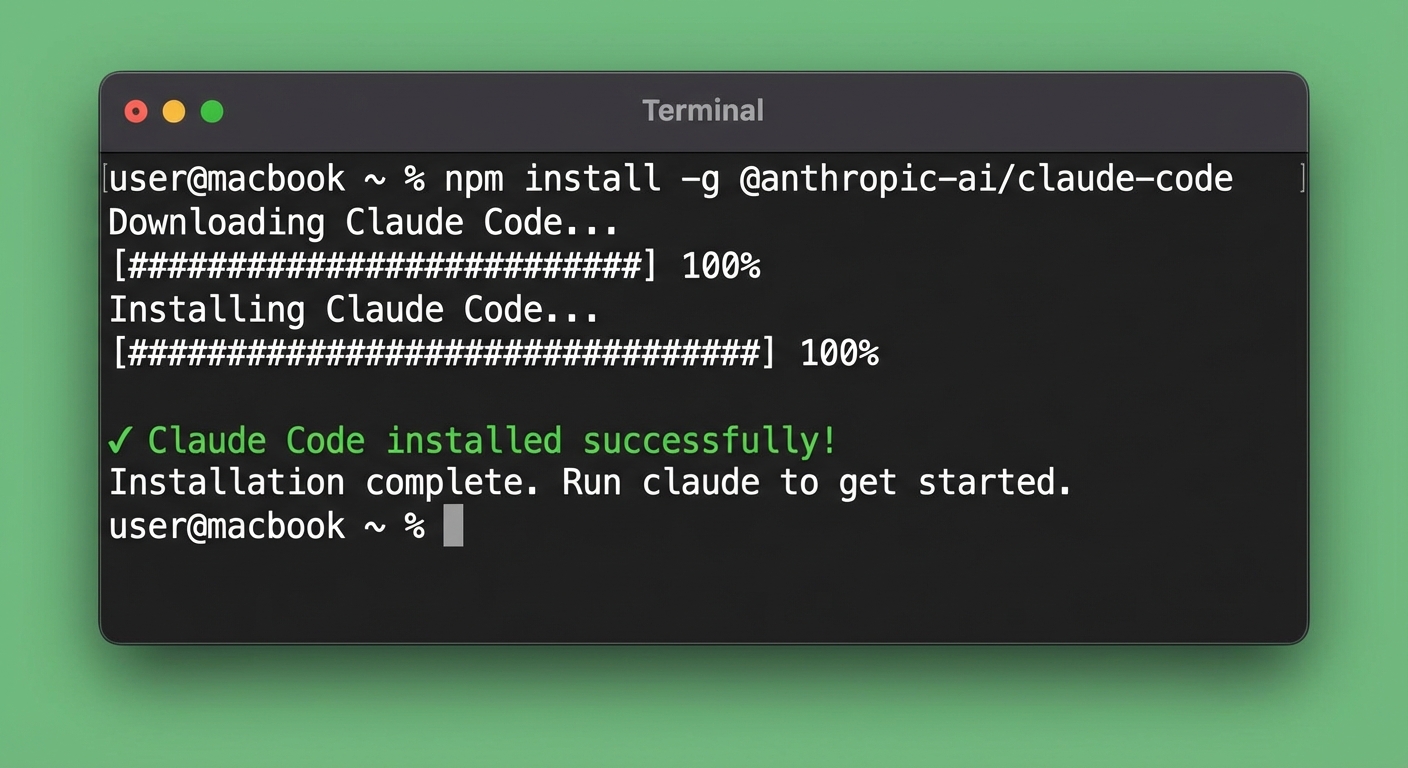
Step 2: Install Claude Code
Copy and paste the command below into your terminal. Then hit enter.
curl -fsSL https://claude.ai/install.sh | bashThis downloads the Claude Code installer from Anthropic's website and runs it.
Windows:
irm https://claude.ai/install.ps1 | iexSame thing — downloads and runs the installer using PowerShell syntax.
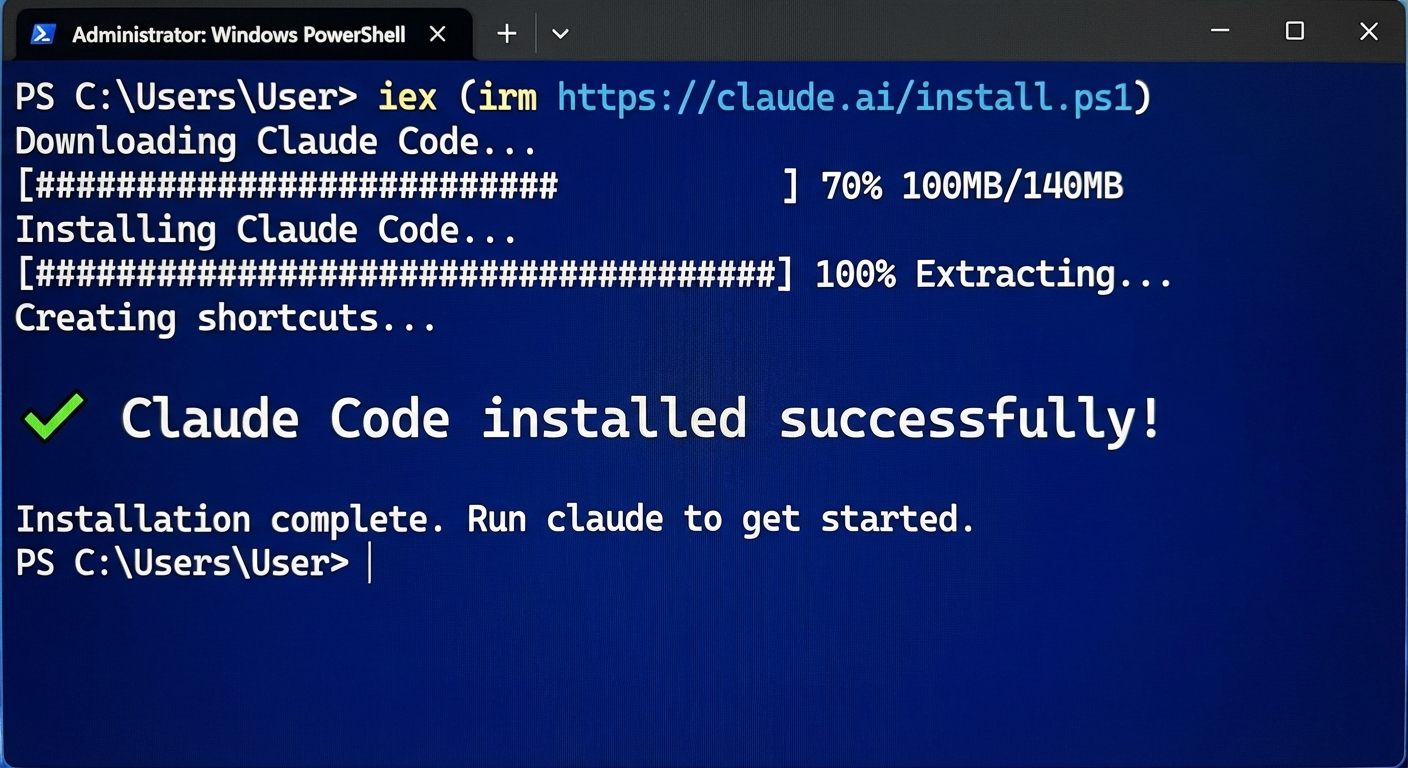
After installation, close your terminal and open a fresh one. Then verify:
claude --version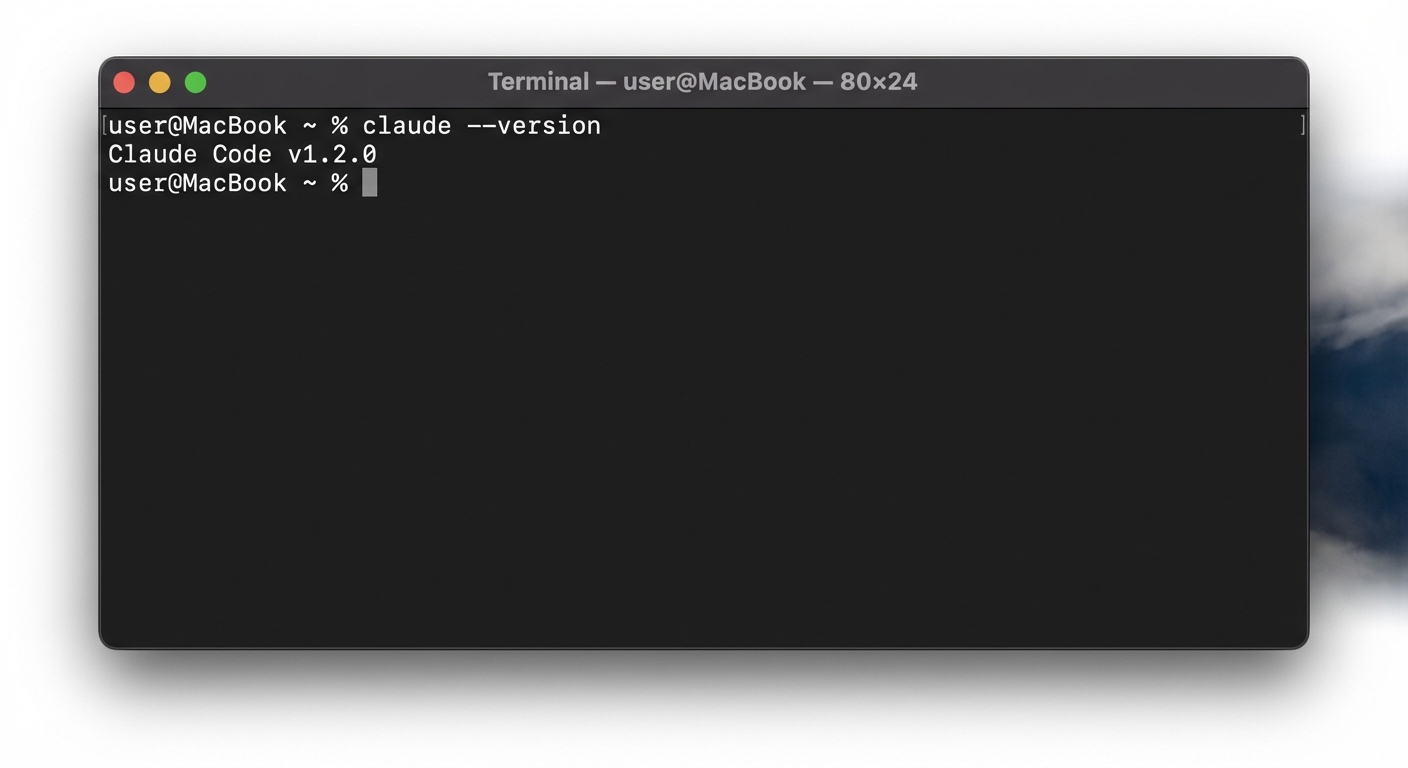
Seeing "command not found: claude"? This is normal. It means you didn't open a fresh terminal after installing. Close your terminal completely (not just the tab — quit the app), open a brand new one, and try claude --version again. The install worked — your old terminal just doesn't know about it yet. If that still doesn't fix it, check the Troubleshooting section at the bottom of this page.
Step 3: Choose Your Plan
Claude Code requires either a Claude subscription or an Anthropic API account.
Option A: Claude Pro or Max Subscription (Recommended)
One monthly subscription covers both Claude on the web AND Claude Code in your terminal.
| Plan | Price | Capacity |
|---|---|---|
| Claude Pro | $20/mo | Standard Claude Code access |
| Claude Max 5x | $100/mo | 5x capacity of Pro |
| Claude Max 20x | $200/mo | 20x capacity of Pro |
Option B: Anthropic API (Pay-Per-Use)
Charges based on usage. A typical session costs $0.50–$2.00. If you'll use it regularly (which you will), the Pro subscription is almost always the better deal.
Step 4: Connect Your Account
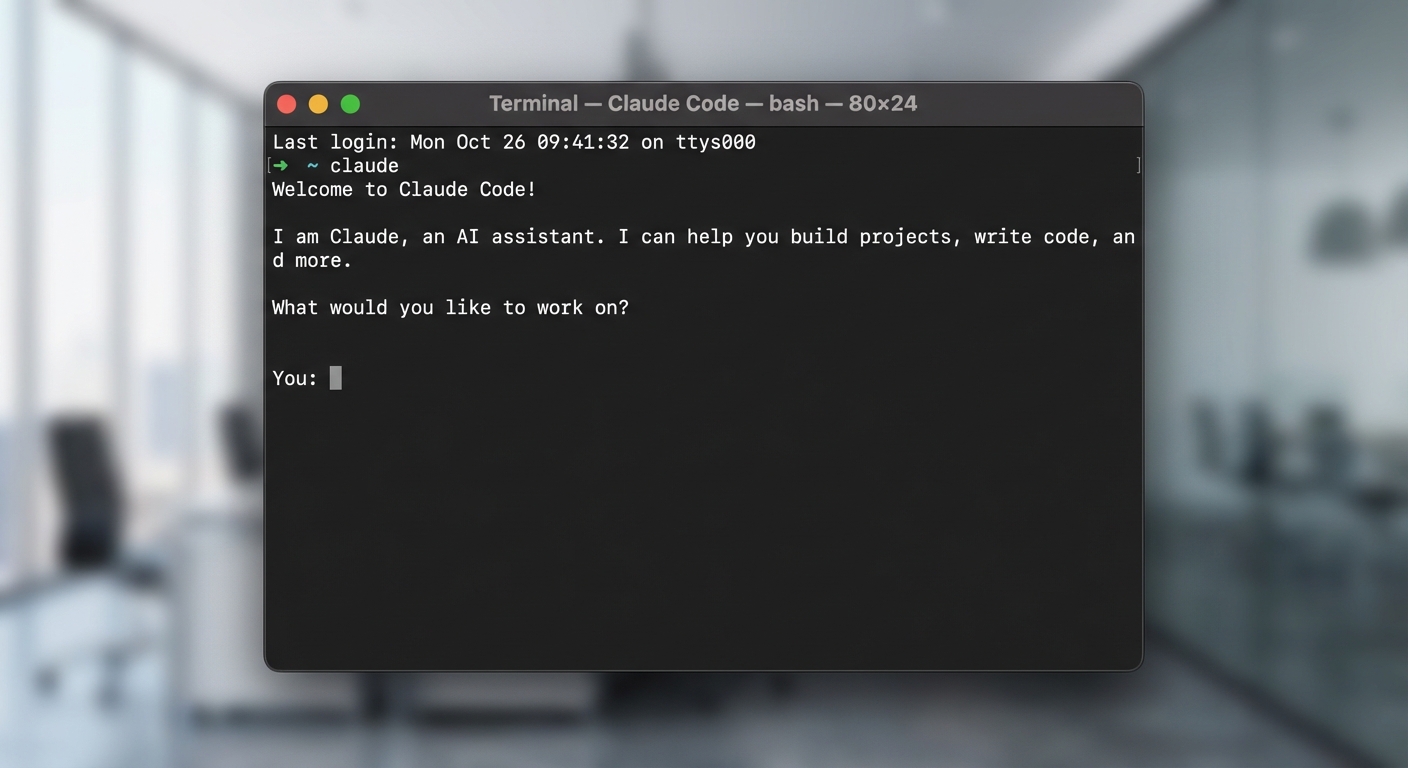
In your terminal, type:
claudeThe first time you run Claude Code, it will walk you through authentication. It will open your browser — log in with your Claude account, approve the connection, and return to your terminal.
Step 5: Your First Run — The "It's Working" Moment
Navigate to your Desktop so the file shows up somewhere you can easily find it.
cd ~/Desktopcd $HOME\DesktopStart Claude Code (if not already running):
claudeNow type this (replacing "YOUR NAME" with your actual name):
Create a file called test.md with the text "Hello, my name is YOUR NAME. This file was created by Claude Code."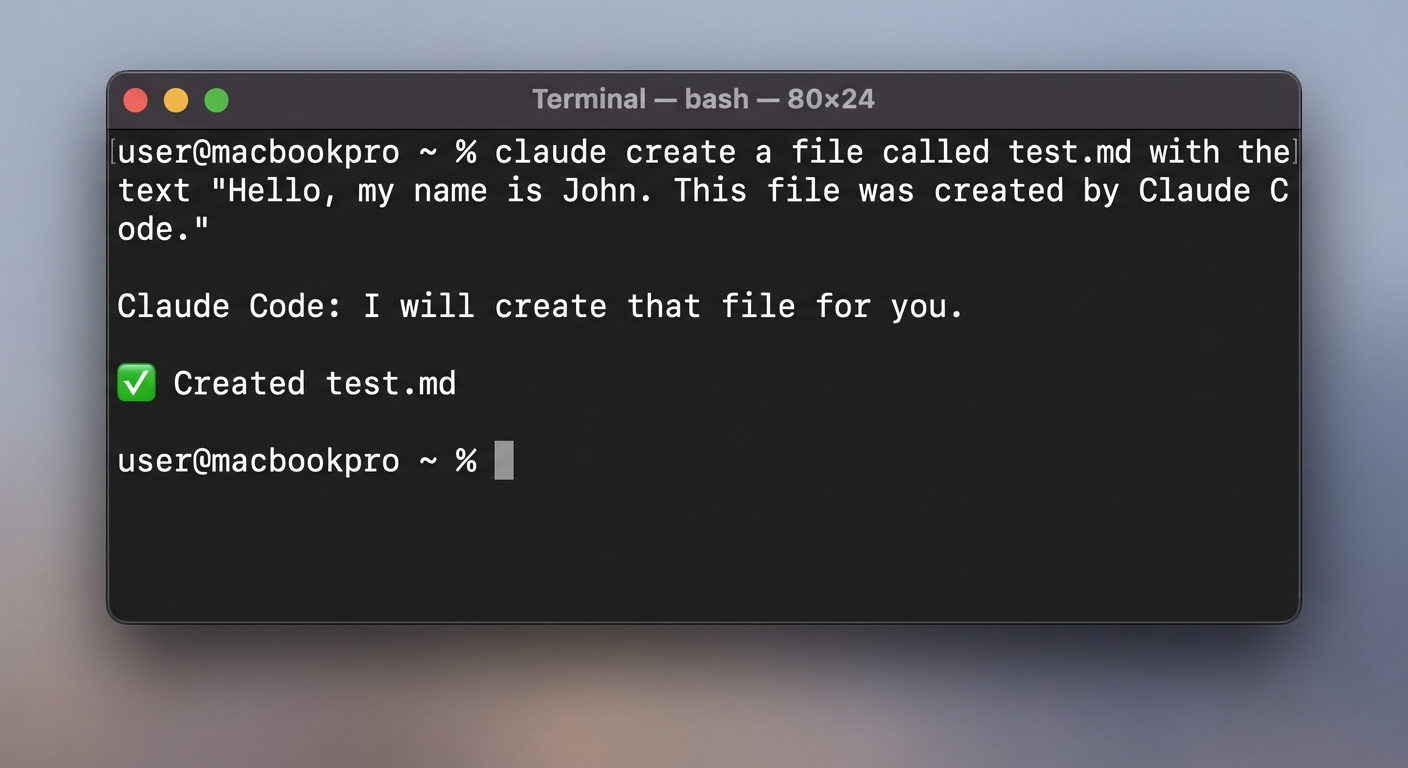
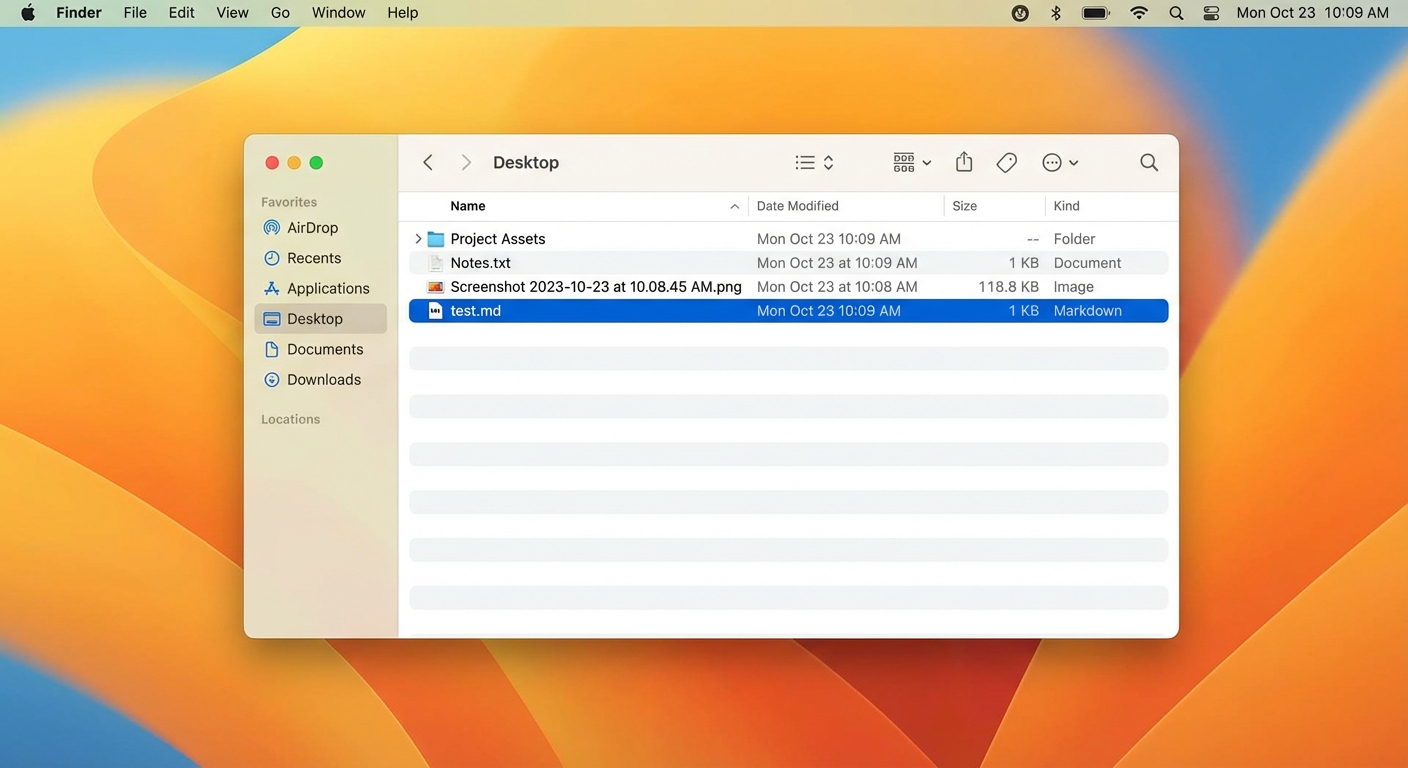
Congratulations. You just had your first building experience with AI. That file is real. It's sitting on your computer. Claude Code didn't just tell you about a file — it MADE one.
Step 6: What NOT to Worry About
- CLAUDE.md files — You'll learn about these in the program.
- Skills and agents — Program content. Not now.
- VS Code or IDE integration — Optional and advanced.
- MCP servers — You don't need to know what this is yet.
- Slash commands — You'll pick these up naturally.
Right now, all that matters is: can you type claude and get a response?
Troubleshooting
"command not found: claude"
▶Your computer doesn't recognize the command. Close your terminal, open a fresh one, try again.
If that doesn't work, re-run the install command. On Mac, also try:
echo 'export PATH="$HOME/.local/bin:$PATH"' >> ~/.zshrc && source ~/.zshrc"Authentication failed" or "API key invalid"
▶Run claude logout then claude login to start fresh. Make sure you're logging in with the email that has your subscription.
"Permission denied" / "EACCES" (Mac)
▶Do NOT use sudo. Instead:
mkdir -p ~/.local/bin
curl -fsSL https://claude.ai/install.sh | bash"Execution of scripts is disabled" (Windows)
▶Open PowerShell as Administrator and run:
Set-ExecutionPolicy -ExecutionPolicy RemoteSigned -Scope CurrentUserThen type Y to confirm, and re-run the installer.
Nothing here fixes my problem
▶Take a screenshot, note which step you're on and your OS. Email [email protected]. Don't spend more than 15 minutes wrestling with an error — that's what support is for.
You're Done When...
claude in your terminal and Claude Code respondsSetting Up Obsidian
Obsidian is where everything you build with Claude will live.
Remember the mental model from Part 1 — plain files on YOUR computer, not someone else's cloud. Every document, every plan, every piece of research Claude creates for you will be a file sitting in a folder on your machine. Obsidian is the app that makes those files easy to read, navigate, and organize.
We're not doing anything complicated today. We're just getting Obsidian installed, creating your workspace, and proving that it connects to Claude Code.
What is a Vault?
A vault is just a folder on your computer. That's it. Obsidian looks at that folder and shows you the files inside as notes. If Obsidian disappeared tomorrow, your files would still be right there in that folder. They're yours.
Step 1: Download Obsidian
Open your web browser and go to: obsidian.md/download
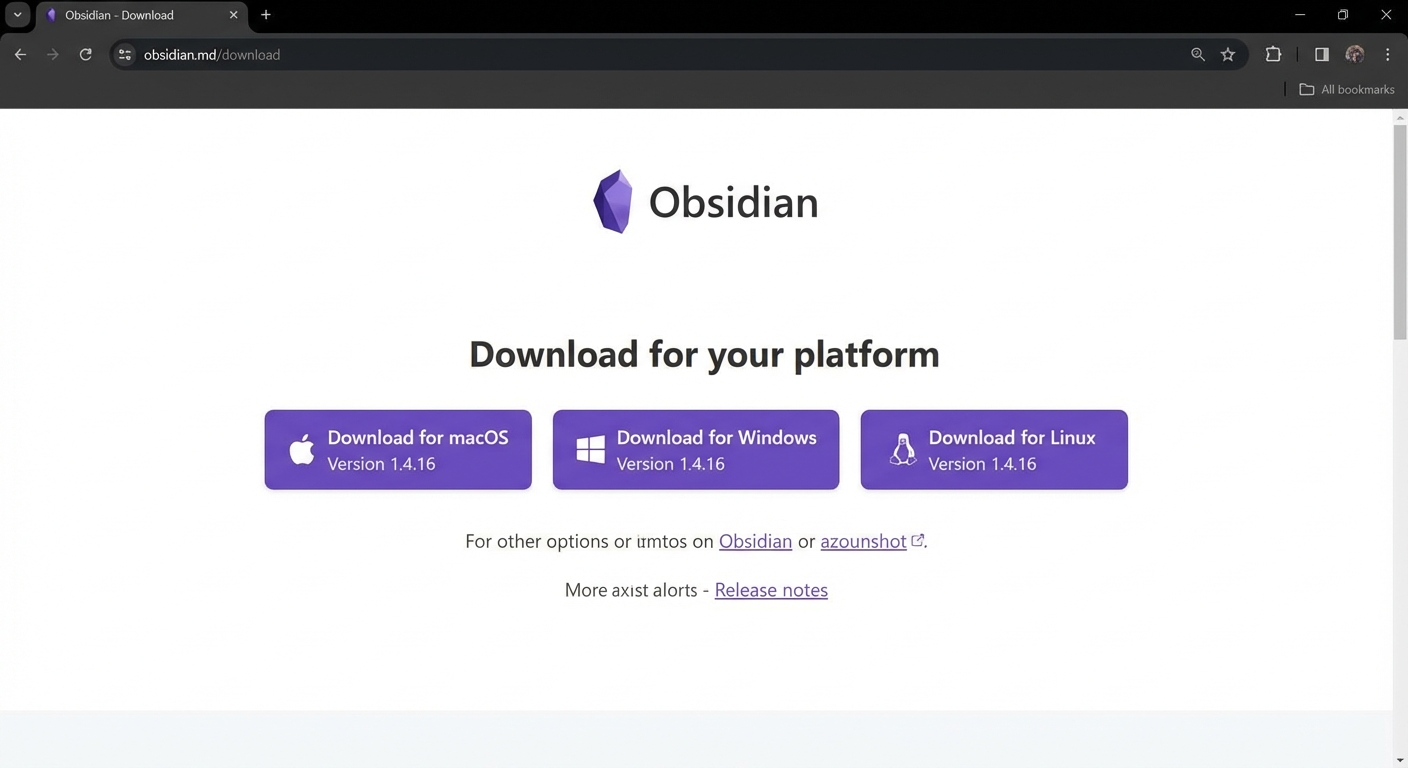
Click the macOS button. Downloads a .dmg file.
Click the Windows button. Downloads a .exe file.
Step 2: Install Obsidian
- Open your Downloads folder and double-click the
.dmgfile - Drag the Obsidian icon into the Applications folder
- Open Obsidian from Applications (or Spotlight:
Cmd + Space, type "Obsidian")
If your Mac asks "Are you sure you want to open it?" — click Open. This is normal.
- Open Downloads and double-click the
.exefile - Follow the installer prompts
- Obsidian should open automatically when finished
Step 3: Create Your Program Vault
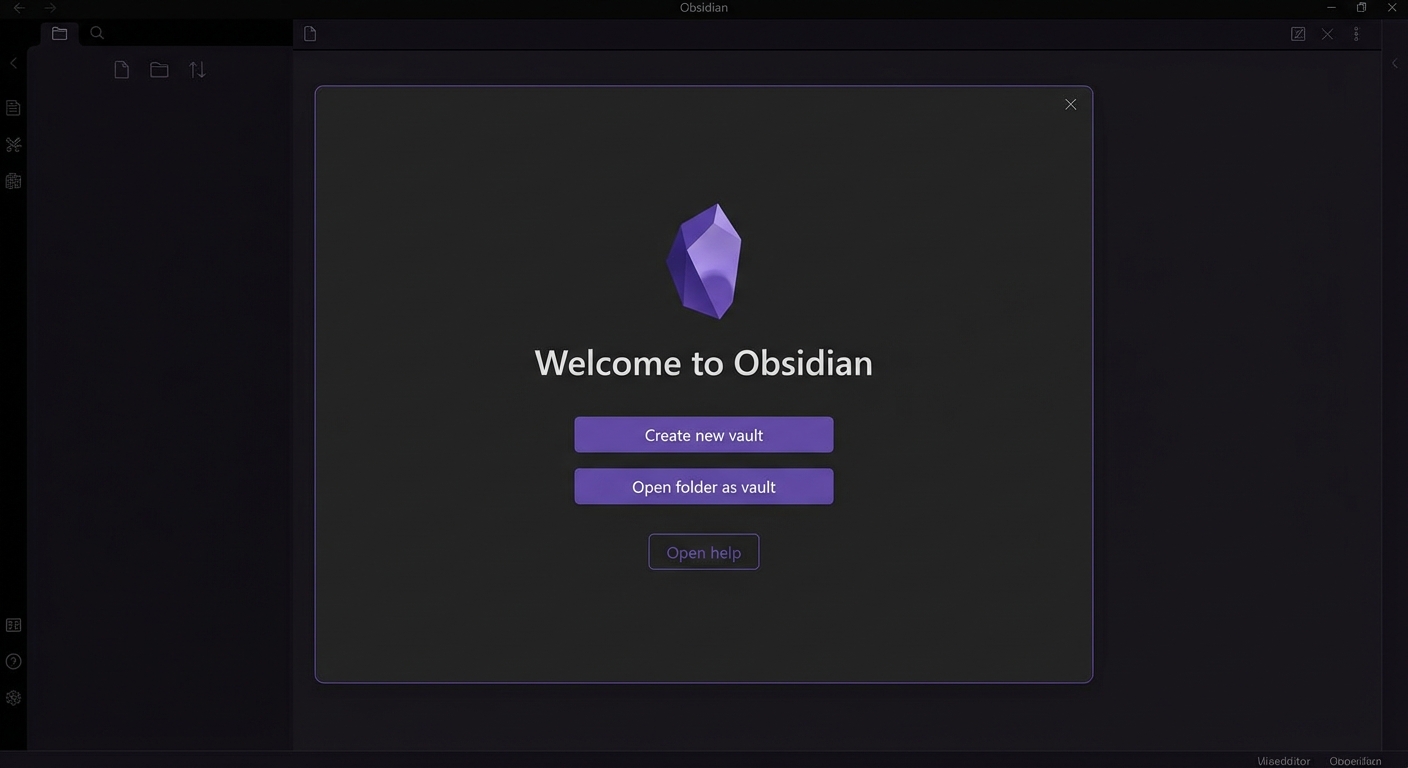
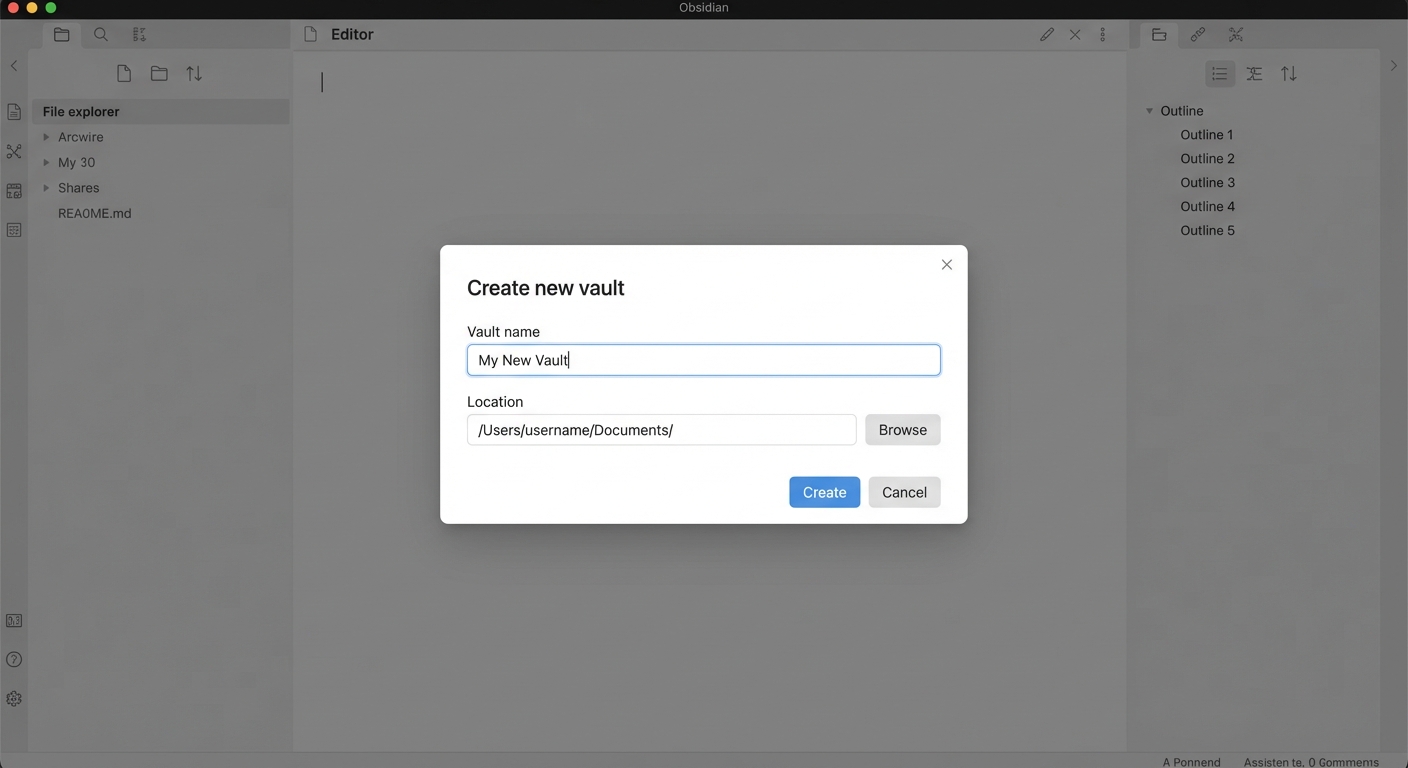
Click "Create new vault." You'll see fields for a vault name and location. Read everything below before you click Create.
Vault name: Something simple — AI-Training, your program name, or whatever makes sense.
Before you choose a location: Do NOT put your vault in any folder that syncs to iCloud, OneDrive, or Dropbox. Cloud sync can corrupt files that Claude creates. That's why we recommend your home folder (Mac) or C:\ (Windows) — these don't sync by default.
Location — THIS PART MATTERS:
- Click Browse next to the location field
- Navigate to your home folder (the top level, not inside any subfolder)
- Full path:
/Users/[YourName]/ - Click Choose
- Click Browse next to the location field
- Navigate to This PC > Local Disk (C:)
- Full path:
C:\ - Click Select Folder
Already use Obsidian? Create a SEPARATE vault for this program. Don't mix program files with personal notes.
After you've found the right location, click Create.
Step 4: What You're Looking At
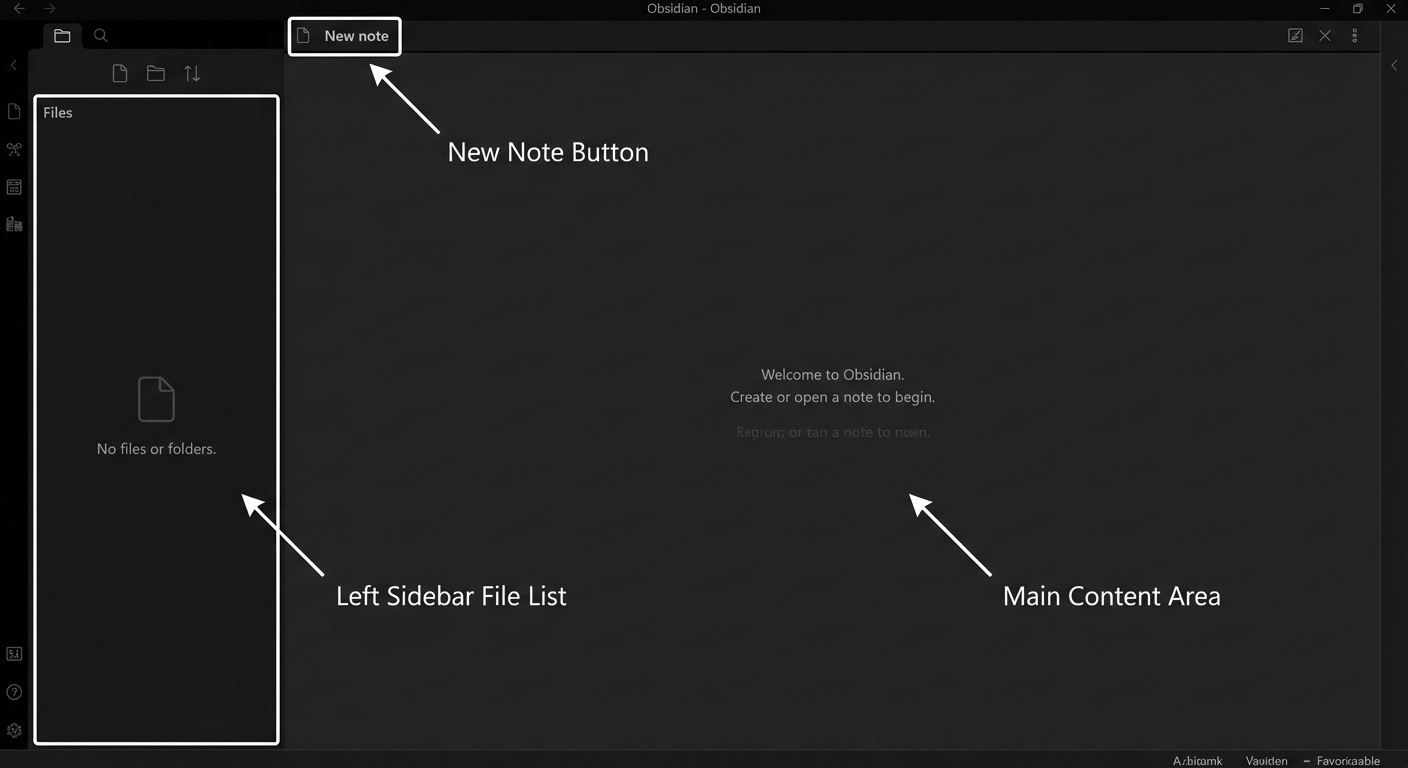
Left sidebar: Your file list. Every note shows up here.
Main area: Where you read and write notes. That's all you need to know right now.
Step 5: Create Your First Note
- Click the New note icon (document with a plus sign), or press
Cmd + N(Mac) /Ctrl + N(Windows) - Type a title:
Hello - Type below it:
This is my first note in my AI training vault. - It saves automatically.
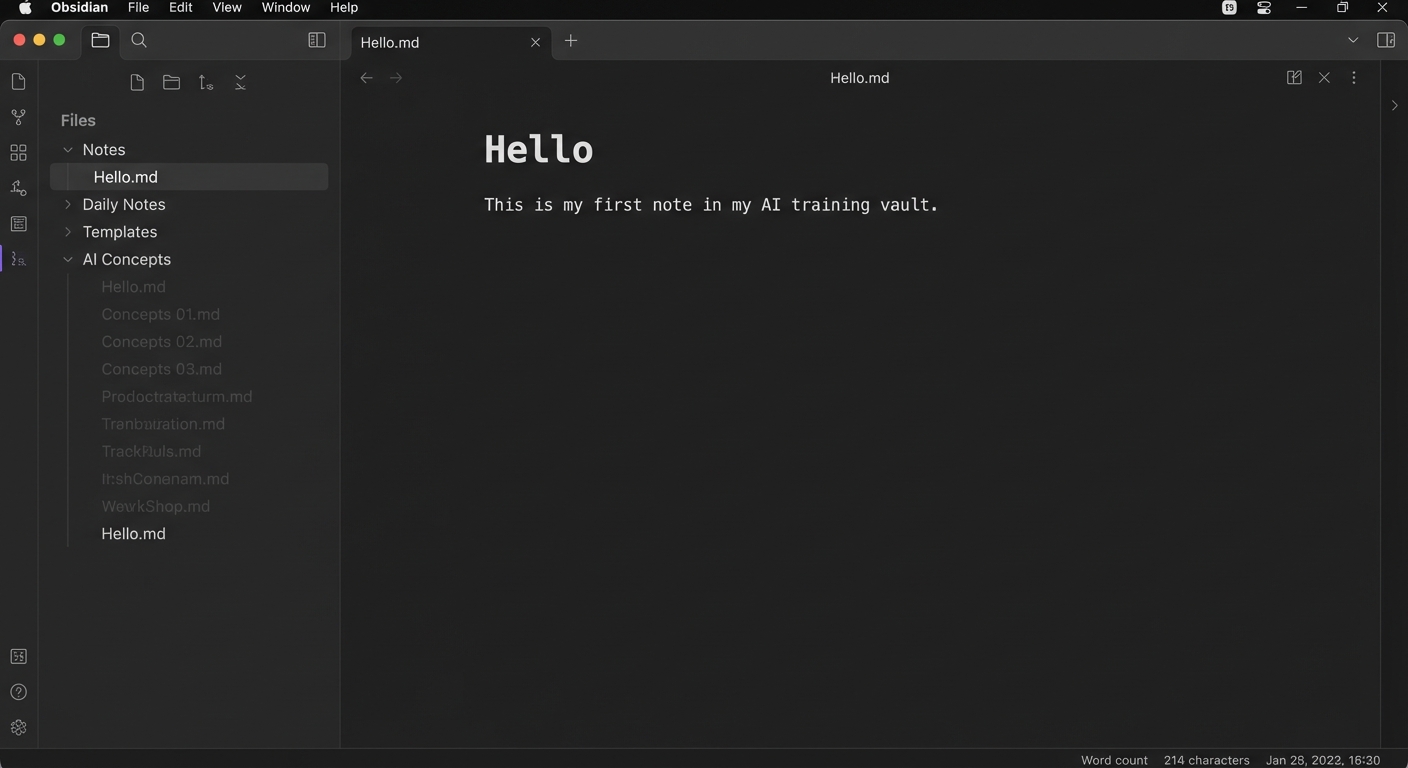
Step 6: Find Your Vault Folder
Let's prove that file is real — find it outside Obsidian.
Open Finder, navigate to your home folder, open your vault folder. There it is: Hello.md
Open File Explorer, navigate to C:\, open your vault folder. There it is: Hello.md
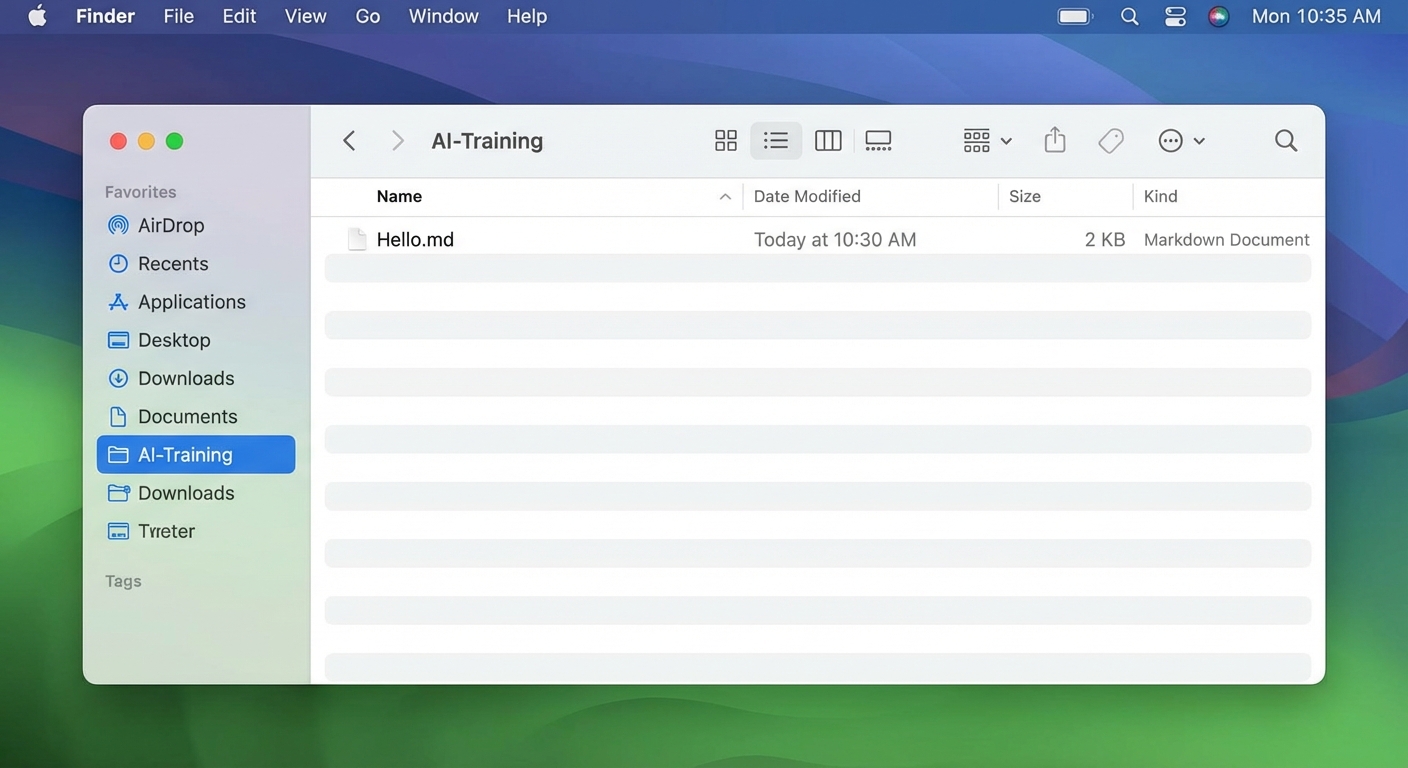
No database, no proprietary format, no cloud service. Just a folder with text files.
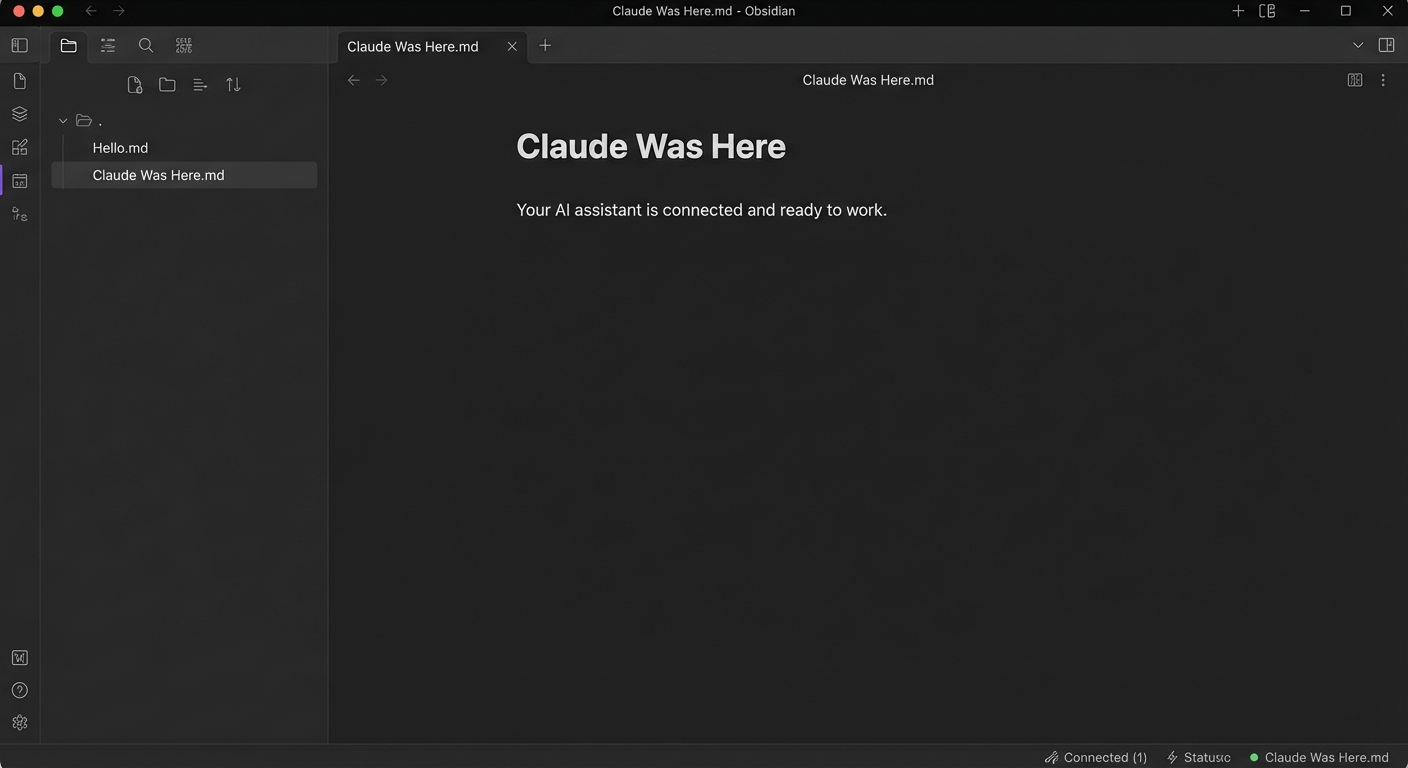
Step 7: The Claude Code Connection
This is where Parts 2 and 3 come together. Navigate to your vault in the terminal:
cd ~/AI-Trainingcd ~\AI-TrainingStart Claude Code:
claudeAsk Claude to create a note:
Create a note called "Claude Was Here.md" with the message "Your AI assistant is connected and ready to work."Switch back to Obsidian. You should see "Claude Was Here" in your sidebar.
Step 8: What is Markdown?
Markdown is a simple way to format text. Use # for headings, ** for bold, - for bullets. You don't need to learn it now. Claude writes in Markdown, and Obsidian displays it beautifully.
Step 9: What NOT to Worry About
- Plugins — We'll add those in Part 4.
- Themes — Cosmetic. Not important now.
- Graph view — Cool but not relevant yet.
- Tags, links, backlinks — Program content.
- Obsidian Sync — Not needed for this.
- Settings — Leave at defaults.
You're Done When...
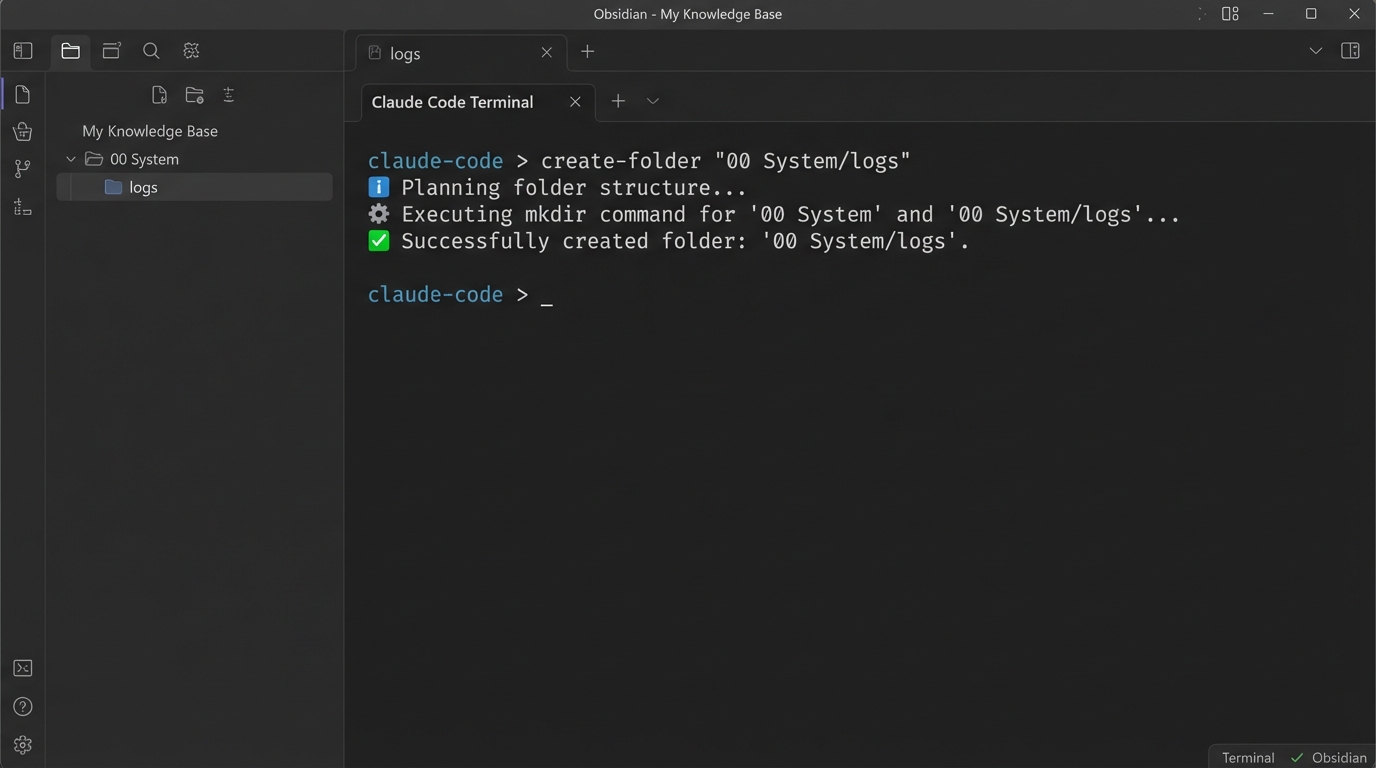
Bringing Claude Code Inside Obsidian
Right now you have two separate tools: Claude Code in your terminal and Obsidian as its own app. That works, but it means switching back and forth between windows constantly.
In this guide, you're going to put Claude Code inside Obsidian. Notes on the left, Claude Code terminals on the right — all in one window.
Pick your operating system — the terminal plugin and setup steps below are different for Mac and Windows:
How This Works (30-Second Version)
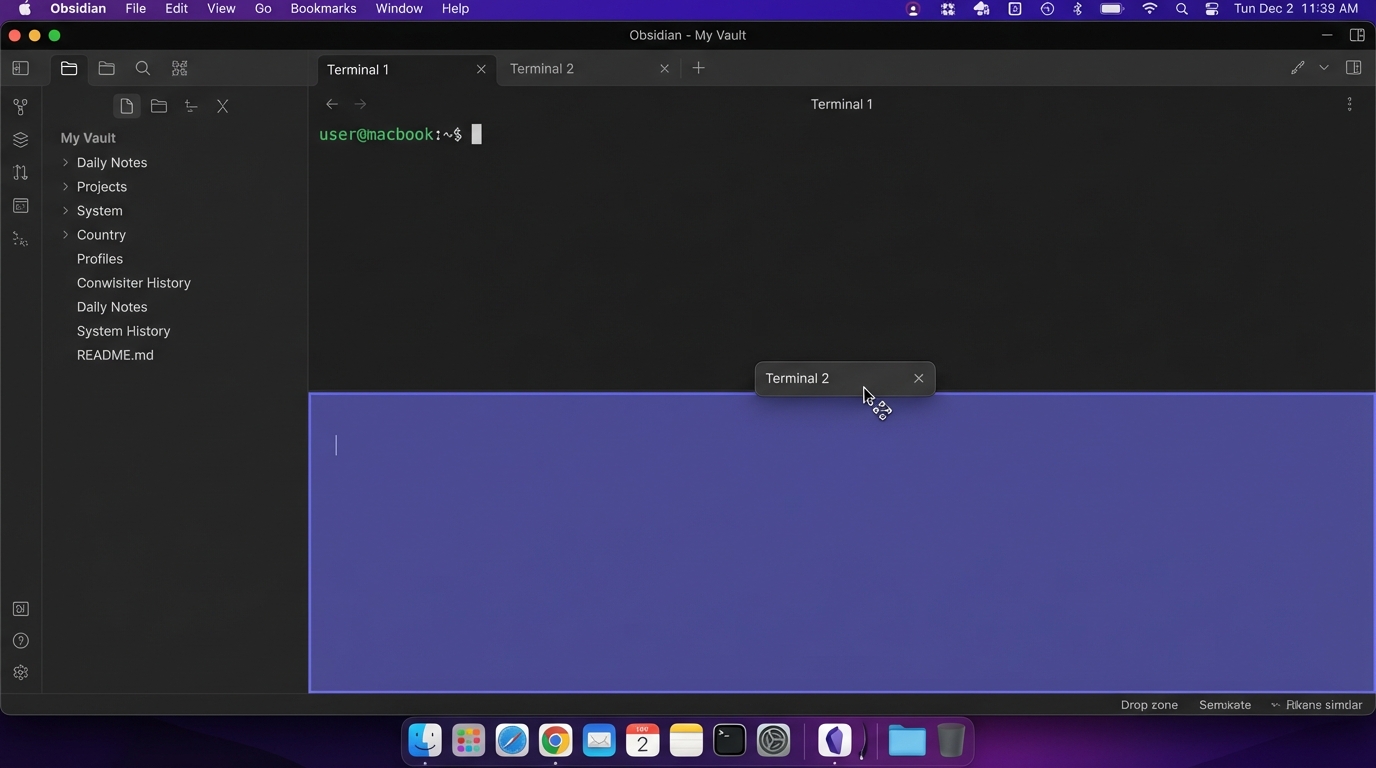
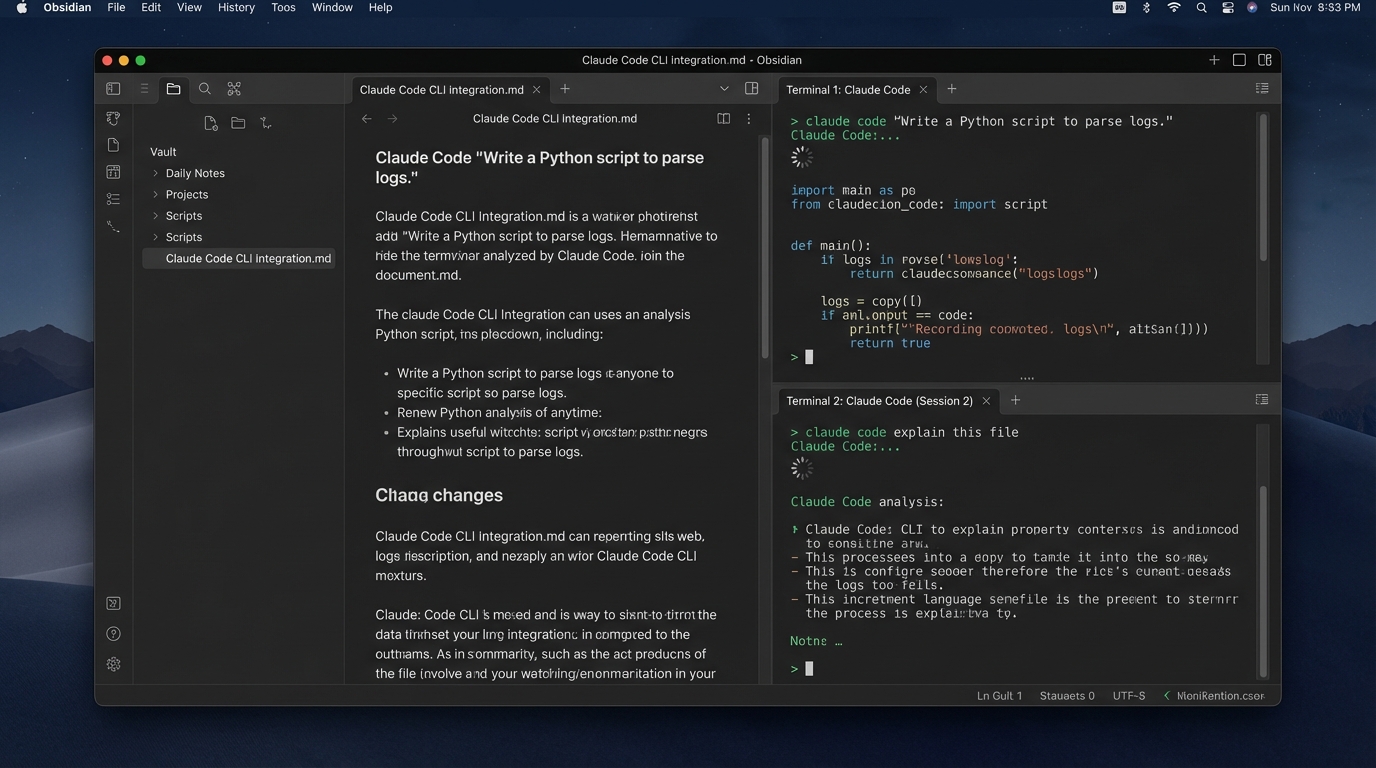
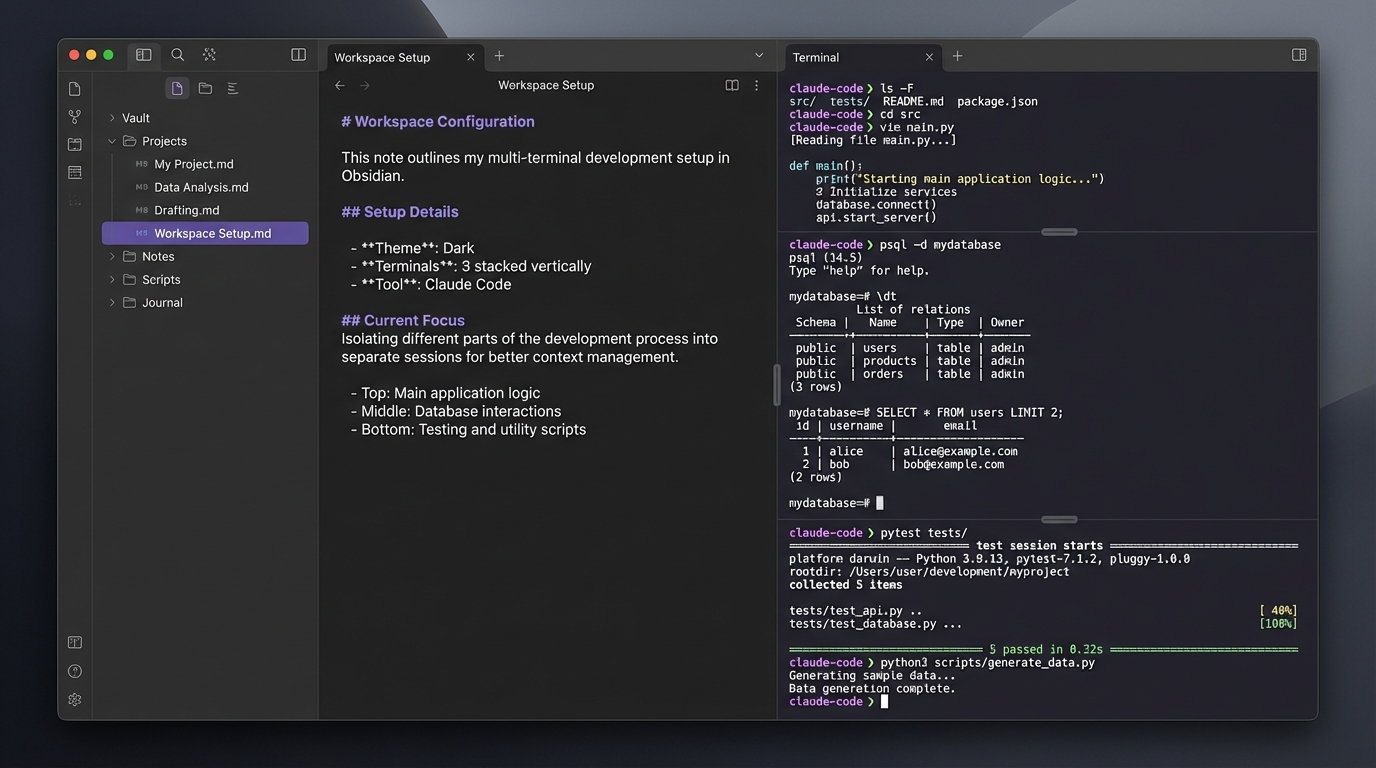
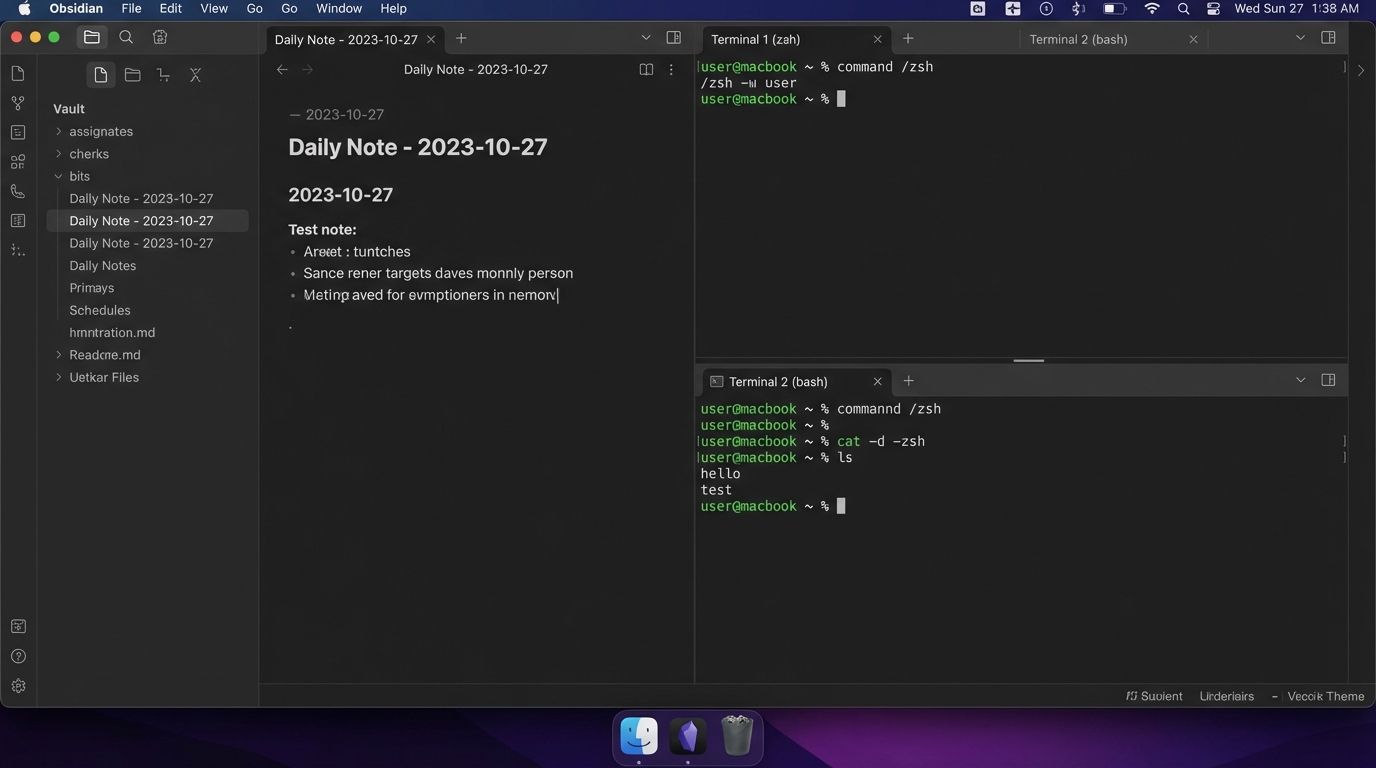
Obsidian has a plugin system. One plugin, Terminal (by polyipseity), adds terminal panels directly inside the Obsidian window. You type claude in one of those panels, and Claude Code starts up with full access to your vault. That's the whole concept.
Obsidian has a plugin system. One plugin, Terminal (by Quorafind, also called O-Terminal), adds terminal panels directly inside the Obsidian window. You type claude in one of those panels, and Claude Code starts up with full access to your vault. That's the whole concept.
Enable Community Plugins in Obsidian
▶Obsidian ships in "safe mode" that blocks third-party plugins. Turn it off:
- Open Obsidian with your vault from Part 3
- Click the gear icon (bottom-left) to open Settings
- Click Community plugins in the left sidebar
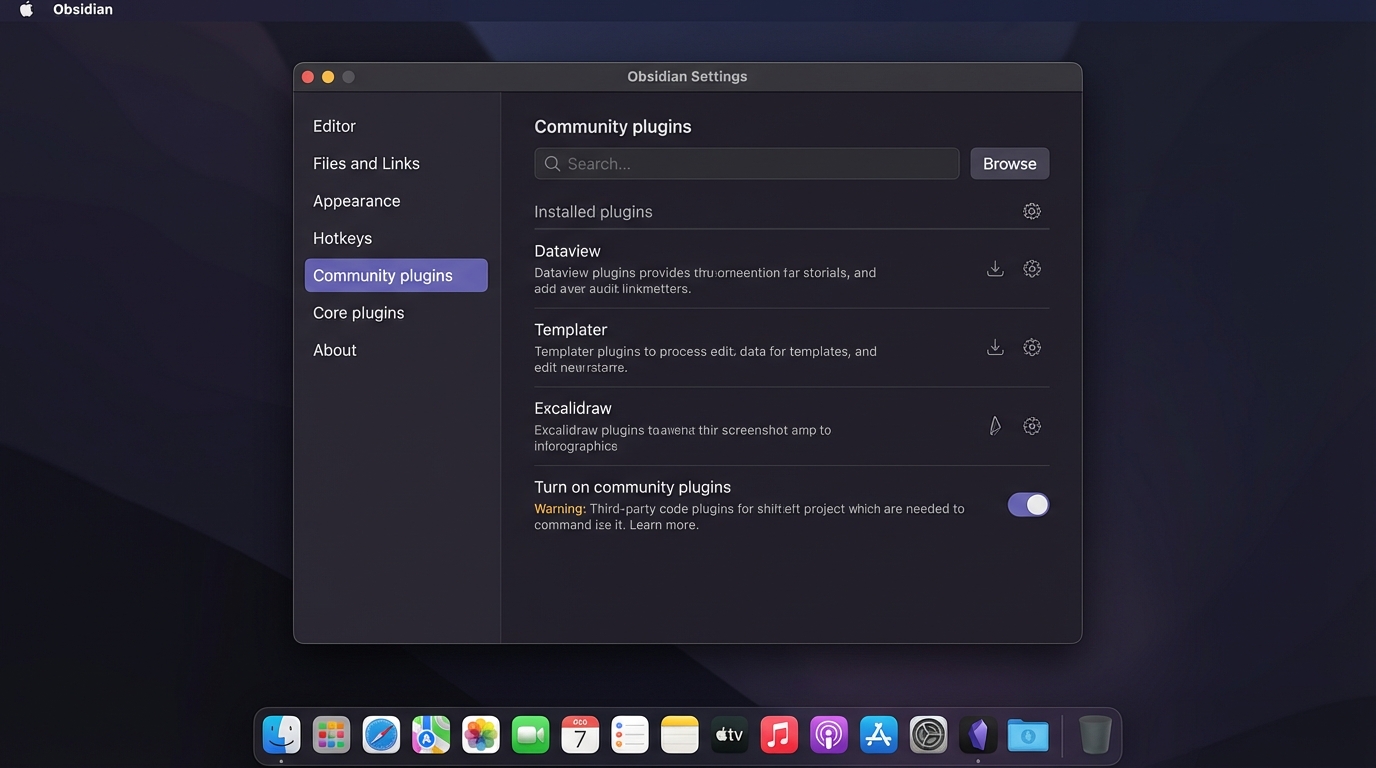
- Click Turn on community plugins
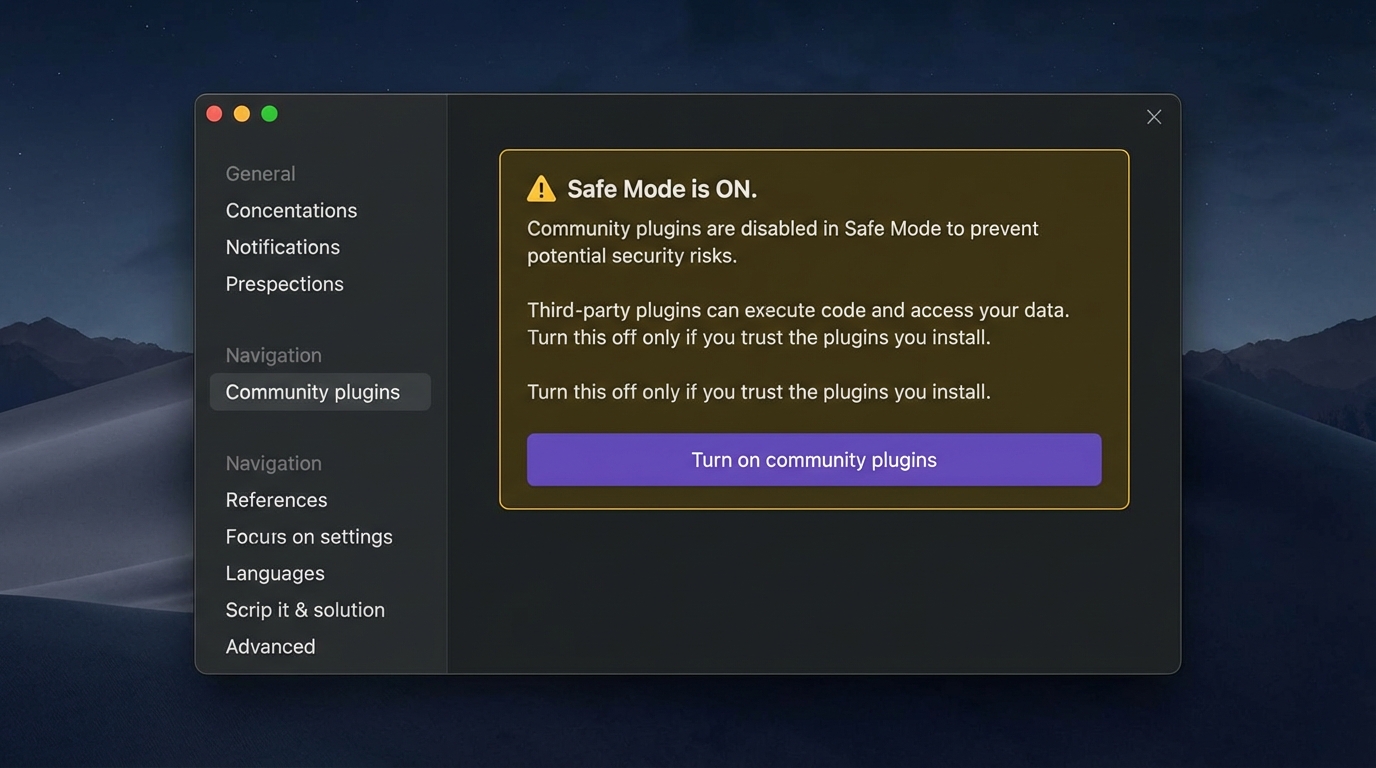
You should now see a Browse button.
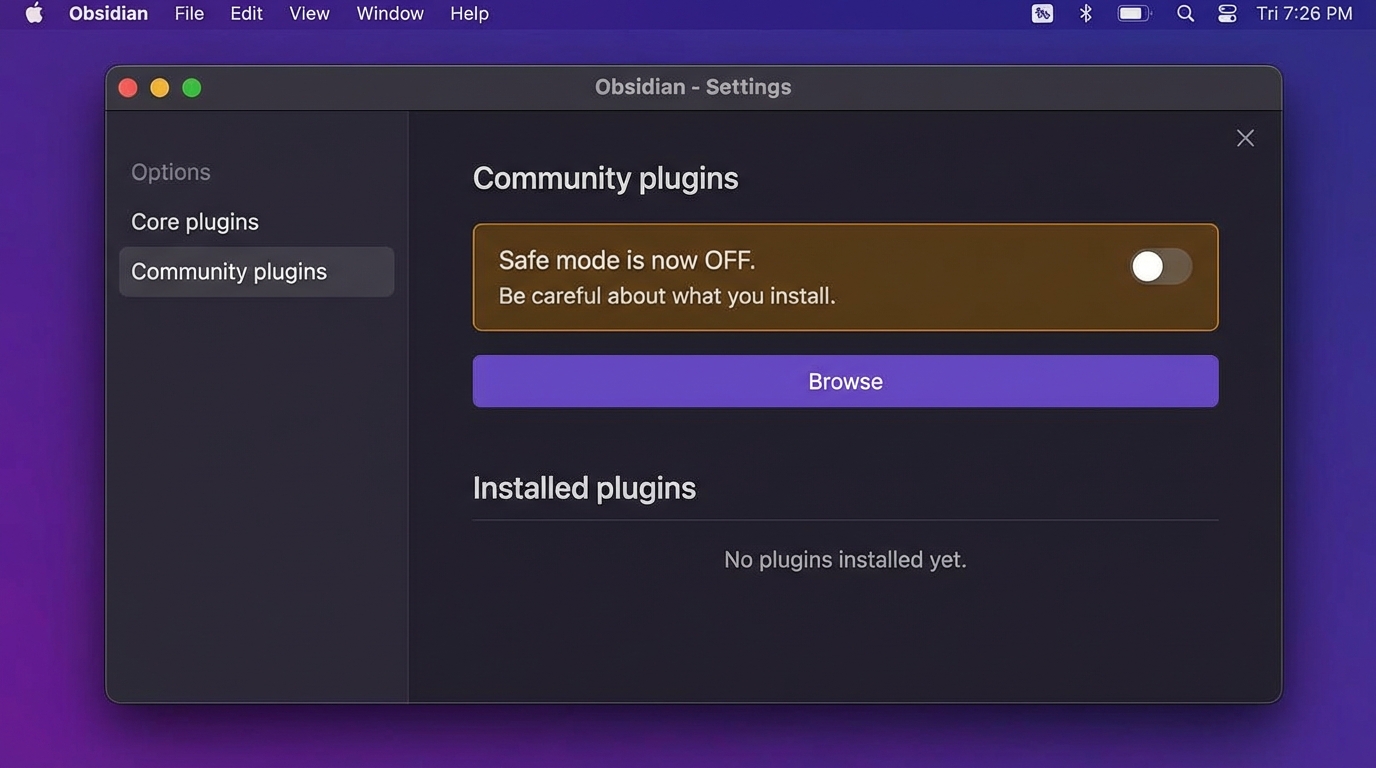
Install the Terminal Plugin
▶MAC INSTRUCTIONS
You're going to install a plugin called Terminal by polyipseity. This gives you a terminal built right into Obsidian so you never have to leave the app.
- In Obsidian, click the gear icon (bottom-left) to open Settings
- Click "Community plugins" in the left sidebar
- Click "Browse" and search for "Terminal"
- Find the one that says "Terminal" by polyipseity — click Install, then Enable
Clean up the profiles:
- Still in Settings, scroll down the left sidebar to find "Terminal" under the Installed Plugins section. Click it.
- You'll see a Profiles section with several entries listed
- Find the one called "Darwin integrated default" — this is the one you want to keep
- For every other profile: click the three dots (…) next to it and choose Delete. Remove them all except Darwin integrated default.
- Now click the pencil icon next to "Darwin integrated default" and rename it to "Claude"
Now when you open a terminal, you'll get one clean option instead of a confusing list.
On Windows? The Mac plugin (polyipseity) doesn't work on Windows. Switch to the Windows toggle at the top of Part 4 for your instructions (the plugin is called O-Terminal).
WINDOWS INSTRUCTIONS
On Windows, the terminal plugin that works best is called O-Terminal (by Quorafind). It isn't in the Community Plugins browser, and it needs a Windows-specific native binary (node-pty) to actually run terminals — so the cleanest way to install it is to let Claude do the whole thing in one pass.
Heads up: if you just install the plugin files without the native binary, Obsidian will throw a "Terminal plugin requires native modules" notification in the top-right. The prompt below installs both pieces at once, so you never see that error.
Open the Claude desktop app (log in to your account), click the Code tab at the top, and paste this exactly:
Install the "Terminal" Obsidian plugin by Quorafind (also called O-Terminal) in my vault, INCLUDING the Windows native binary so I don't get the "Terminal plugin requires native modules" warning. Work methodically and confirm each step.

STEP 1 — Find my vault
Locate my Obsidian vault folder on this Windows machine (ask me for the path if you can't find it). All file placement goes inside .obsidian/plugins/o-terminal/ relative to that vault.

STEP 2 — Find my Obsidian Electron version
Ask me to open Obsidian, press Ctrl+P, run "Show debug info", and paste the result. You need the Electron version so the node-pty binary matches. If I can't get debug info, check the current Obsidian release notes at https://obsidian.md/changelog for its bundled Electron version.

STEP 3 — Download the plugin files
From https://github.com/Quorafind/O-Terminal/releases, grab the latest release's main.js, styles.css, and manifest.json. Place them directly in the vault at .obsidian/plugins/o-terminal/ (create that folder if it does not exist).

STEP 4 — Download the Windows node-pty binary
From the same release (or its linked native-modules assets), download the Windows x64 node-pty prebuild that matches the Electron version from Step 2. Extract it.

STEP 5 — Place the native binary in the RIGHT spot
Inside .obsidian/plugins/o-terminal/, create a folder called native/. Put the extracted node-pty folder INSIDE native/. Final structure must be exactly:

  .obsidian/plugins/o-terminal/
    ├── main.js
    ├── styles.css
    ├── manifest.json
    └── native/
        └── node-pty/  (extracted contents go here)

CRITICAL: node-pty must be inside native/. If it sits directly inside o-terminal/, the plugin will refuse to load and show the "Native modules must match your Electron version" warning.

STEP 6 — Verify and restart
Tell me to fully quit Obsidian (right-click the system-tray icon → Quit, not just close the window), then reopen it. Confirm: (a) the "requires native modules" notification does NOT appear, (b) Settings → Community plugins shows Terminal by Quorafind enabled, (c) Ctrl+P → "Terminal: Open terminal" opens a working terminal panel.

If Step 6 shows any error, diagnose by re-checking: exact folder paths, whether node-pty is inside native/, whether the node-pty version matches Electron.Claude will walk you through each step. When it's done, you'll have a working terminal panel in Obsidian and no native-modules warnings.
Already installed the plugin and seeing the "requires native modules" notification now? The prompt above still works — Claude will detect what's already in place and only install what's missing.
If anything goes wrong: Copy the error message from Obsidian and paste it into the Claude desktop app's Code tab. Claude will diagnose and fix it for you.
Open Your First Terminal Panel
▶Open the Command Palette (Cmd+P on Mac, Ctrl+P on Windows) and type Terminal. Select "Terminal: Open terminal" to open a new terminal panel.
Start Claude Code in the Terminal Panel
▶In the terminal panel, type:
claude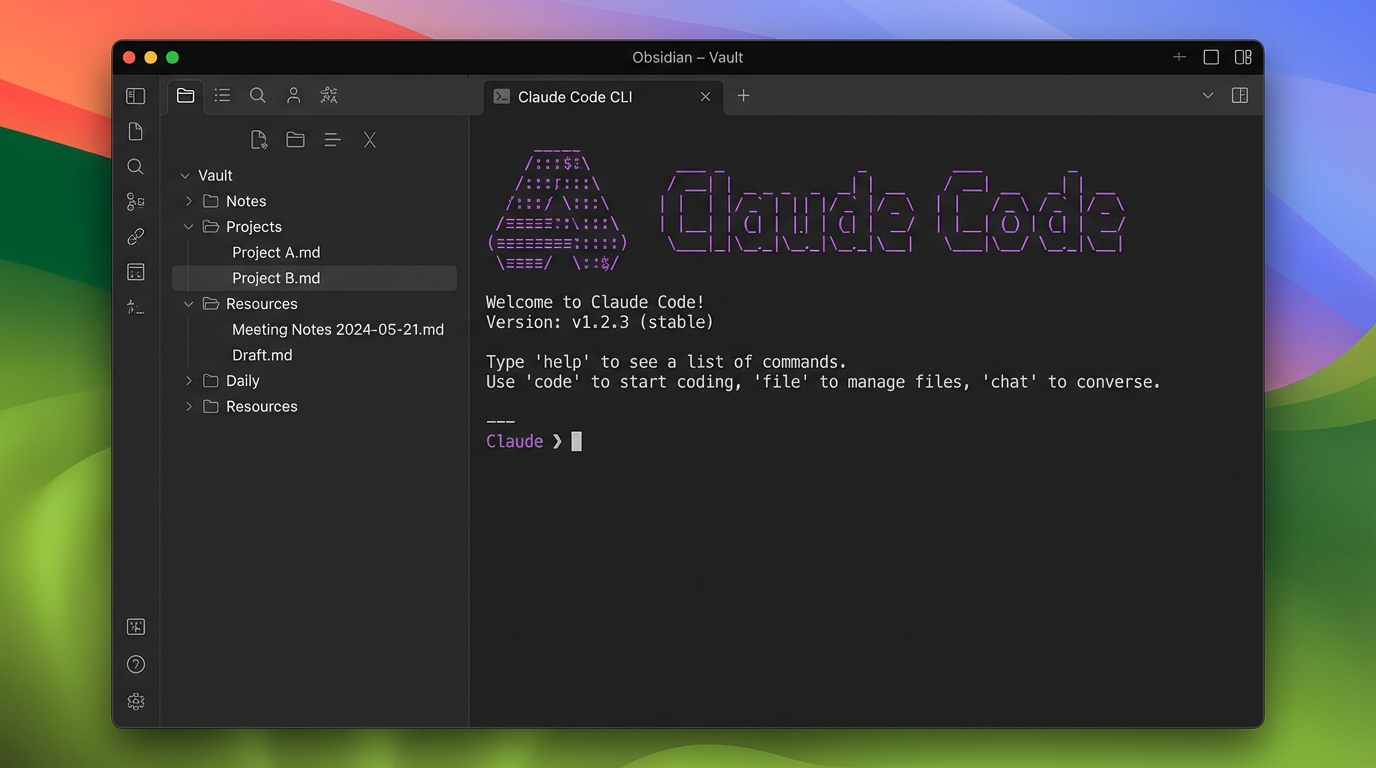
Now test it:
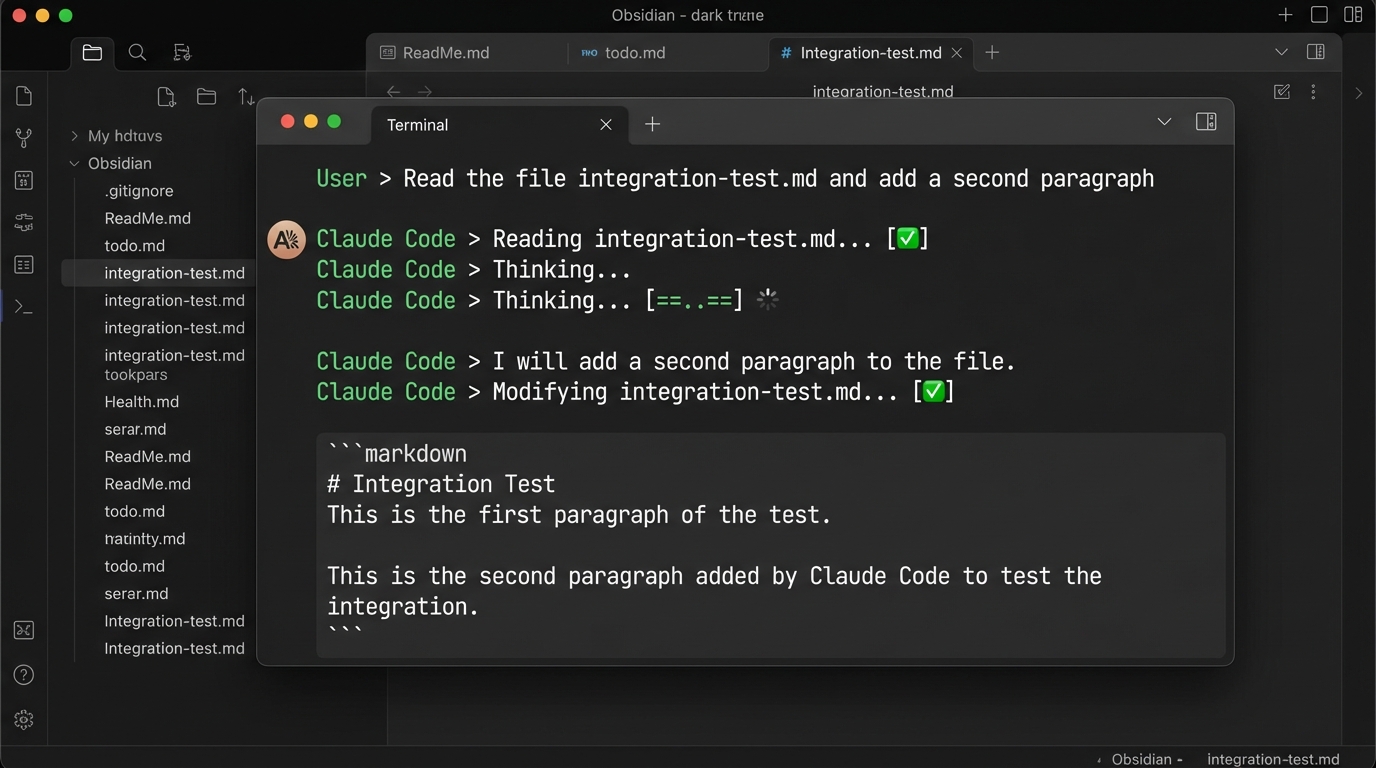
Create a file called integration-test.md with the text "Claude Code is running inside Obsidian. The integration works."
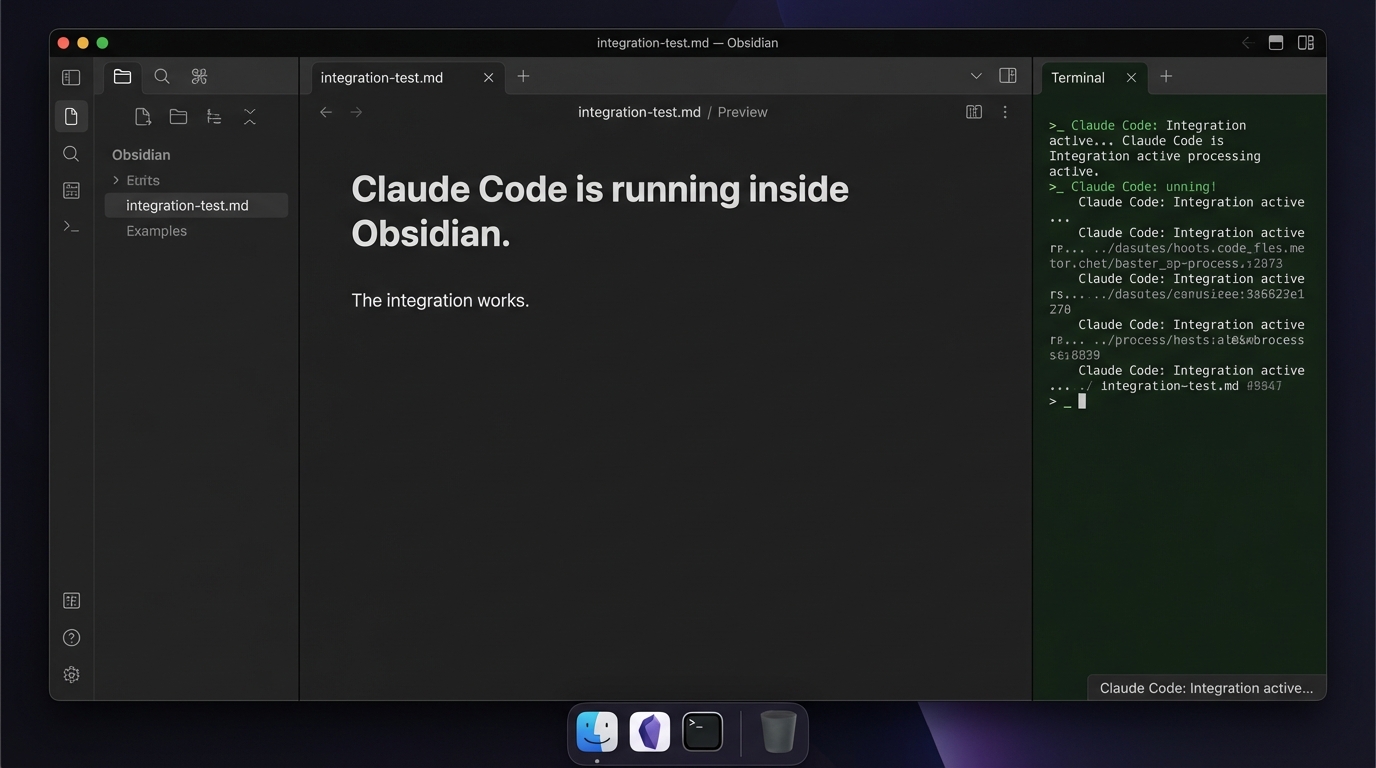
Click the orange Claude logo on the left sidebar to open a Claude panel inside Obsidian. Then type:
helloIf Claude says hi back, you're good to go. That's it — Claude Code is running inside Obsidian.

Troubleshooting
"No terminal option in Command Palette"
▶Go to Settings > Community plugins. Make sure Terminal is toggled on. If it's not in the list, re-run the install step from the Claude desktop app.
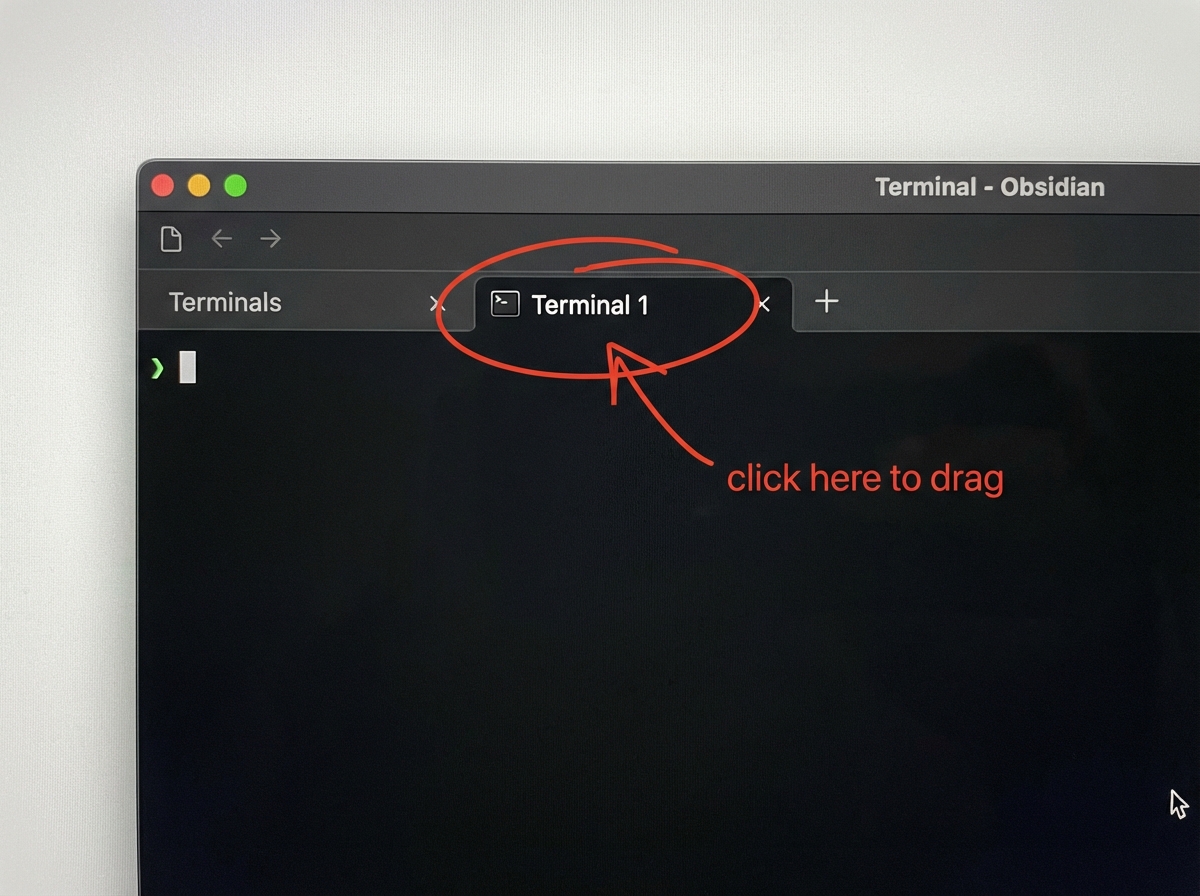
"Can't drag panels to rearrange"
▶Click and hold on the tab name, not the content area. Drag slowly and watch for the blue highlight.
"Claude Code can't see my vault files"
▶Type /exit, navigate to your vault, then restart:
cd ~/AI-Training
claudecd ~\AI-Training
claudeTerminal plugin isn't working / something feels broken in Obsidian
▶The fastest fix for any Obsidian plugin issue: open the Claude desktop app, click the Code tab, and paste whatever error you're seeing. Claude will diagnose and fix it for you.
- Open the Claude desktop app (the app on your computer, not the browser).
- Click the Code tab in the top-left.
- Paste or describe your error. Claude will walk you through the fix.
Still stuck? Email mail@strategicprofits.com — we'll walk you through it.
You're Done When...
claude in that panel and it responds00 System folder is visible in your vaultConnect to Your Program Materials
Your program materials — skills, resources, and everything you'll need for the rest of this package — live in a shared content server. You'll connect Claude Code to it using a personal key we sent you by email.
Step A: Find Your API Key
Check the email you received from Strategic Profits when you enrolled. It contains a personal key that starts with sk_sp_.
Copy it. You'll need it in a moment.
Don't have a key? Go to sp.strategicprofits.com/mcp/access and enter the email address you enrolled with. Your key will be sent to your inbox.
Step B: Open a Terminal
Important: This command runs in a regular terminal window — NOT inside the Claude Code conversation.
If you have Obsidian open: Click the Claude logo on the left sidebar to open a terminal panel. If Claude Code is running in it, type /exit first, then run the command below.
Otherwise: Press Cmd + Space, type Terminal, and press Enter.
If you have Obsidian open: Click the Claude logo on the left sidebar to open a terminal panel. If Claude Code is running in it, type /exit first, then run the command below.
Otherwise: Click Start, type PowerShell, and click "Windows PowerShell."
Step C: Run This Command
Replace YOUR_API_KEY_HERE with the key from your email:
claude mcp add --transport http --header "Authorization: Bearer YOUR_API_KEY_HERE" --scope user sp-shared https://mcp.strategicprofits.com/mcpPaste it into your terminal and press Enter. You should see a confirmation message.
Step D: Restart Claude Code
The connection only loads when Claude Code starts up. Type /exit to close it, then type claude to start fresh.
Step E: Verify It's Working
In your Claude Code session, type:
Tell me my sp-shared statusYou should see your name, email, and a list of available content. That means you're connected.
If you see an error: double-check that you copied your API key correctly in Step C and that you restarted Claude Code in Step D. If it still doesn't work, email mail@strategicprofits.com.
Step F: Download Your Materials
Type this into Claude Code:
Sync my shared contentThis downloads your program skills and resources directly into Claude Code. Everything you need for Parts 5–7 comes through here.
You can run this command again any time to check for updates.
You're Done When...
Profile Interview
This is where Claude gets to know you. Not the surface-level stuff — the real picture of your business, how you work, what you're responsible for, and where AI can make the biggest difference.
Claude will have a conversation with you. Not a form. Not a questionnaire. An actual back-and-forth conversation where it asks smart follow-up questions based on your answers.
What Happens During the Interview
Claude will cover nine areas, roughly in this order:
- Identity — Your name, business name, what you do
- Responsibilities — What you're actually responsible for day-to-day (this one matters most)
- Tools — What software and systems you currently use
- Team — Who you work with, who reports to you
- Documents — What types of documents you work with regularly
- Pain Points — Where you waste time, what frustrates you
- Communication — How you prefer to work with AI (tone, detail level, etc.)
- Goals — What you want to get out of this program
- Future Vision — Where you see your business going with AI
The more specific and honest you are, the better your system will be. Claude uses your answers to design your vault structure, write your CLAUDE.md configuration, and prepare your client dossier for the Strategic Profits team.
How to Run It
Open a Claude Code terminal panel inside Obsidian (from Part 4) and type:
Run This Command
Claude will start the conversation. Just answer naturally. Take your time. If you need to step away, Claude saves progress after each section — you can pick up where you left off.
What Gets Created
00 System/CLIENT-PROFILE.md— Your complete profile, organized by category00 System/logs/_interview-progress.md— Auto-saved progress (in case you need to resume)
Tips
- Be specific about your responsibilities — not "marketing" but "I write all email sequences, manage our Facebook ads, and review landing page copy before it goes live"
- Don't worry about being polished. Claude works better with real, messy, honest answers than with carefully crafted ones.
- If Claude asks something you don't have a good answer for, say so. "I don't know yet" is a perfectly valid answer.
You're Done When...
00 System/CLIENT-PROFILE.md exists with your informationFile Discovery & Organization
Now that Claude knows who you are and what you do, it's time to bring your existing documents into the system. Claude will help you find important files on your computer, convert them to Markdown, and organize them into a vault structure designed around your role and responsibilities.
What Happens During File Discovery
- Vault Structure — Claude proposes numbered folders (02+) based on your profile, asks you to approve or adjust
- Guided Search — Claude scans your common document locations (Desktop, Documents, Downloads) for relevant files
- Conversion — Found files get converted to Markdown and placed in the right folders
- Review — Claude shows you each converted file so you can check it looks right before moving on
- Cloud Files — Claude gives you instructions for downloading files from Google Drive, OneDrive, etc.
- Completion Report — Summary of everything that was brought in
How to Run It
Run This Command
Claude will walk you through each step. It scans your file system (with your permission), shows you what it found, and asks before moving or converting anything.
What Gets Created
- Custom folders (02, 03, 04...) — Based on your ranked responsibilities
- Converted documents — Your existing files, now in Markdown format inside your vault
00 System/VAULT-SUMMARY.md— Complete report of what was converted and where it went00 System/CLAUDE.md— Your personal AI configuration file. This is the file Claude reads at the start of every session so it already knows who you are, what you do, and how you like to work. That's all you need to know for now — we'll go deep on this in the program.- Pointer file at vault root — A small
CLAUDE.mdat the top level that points to the full one in 00 System. This way Claude can find your configuration no matter which folder you start in.
Tips
- You don't need to find every file today. Focus on the ones you use regularly.
- Claude can resume where it left off — progress is saved after each responsibility area.
- If you have files in cloud services, Claude will give you download instructions rather than accessing them directly.
You're Done When...
00 System/VAULT-SUMMARY.md exists with the completion report00 System/CLAUDE.md has been generated with your configurationClient Dossier Review
Claude has now built a client dossier — a summary of your entire setup, your business context, your vault structure, and what was accomplished during the grounding process. This dossier gets sent to the Strategic Profits team so they know exactly who you are and where you stand before the program starts.
What the Dossier Contains
- Your business profile summary (from the interview)
- Your responsibilities and pain points
- Your vault structure and what documents were organized
- Your CLAUDE.md configuration
- Your goals for the program
- Technical setup status (what tools are installed, what's working)
How to Review It
If the dossier wasn't already generated at the end of Part 6, run this:
Run This Command
Claude will create the dossier and show you its contents. Read through it. If anything is wrong or missing, tell Claude and it will update the dossier.
When you're satisfied, tell Claude to send it:
Approve & Send
How you'll know it worked: Claude will confirm the dossier was sent and show you a summary of what was delivered. If you want extra confirmation, email [email protected] and ask them to confirm receipt.
What Happens Next
The Strategic Profits team will review your dossier before the program starts. They'll know your business, your setup, your goals, and your current state. When you walk in (or log in) on Day 1, the team already knows who you are.
You're Done When...
00 System/CLIENT-DOSSIER.md exists and you've reviewed itProgram Preparation
Please select your program (Connect the Dots or Force Multiplier) on the Welcome page to see your specific preparation guide.
Connect to Your Program Materials
ZenithMind Elite members only. If you have ZenithMind OS or ZenithMind Plus, skip this page — your program needs no additional connection. Go straight to Part 6: Start ZenithMind →
Your additional skills and resources live in a shared content server. Connect Claude Code to it using the personal key we sent you by email.
Step A: Find Your API Key
Check the email you received from Strategic Profits when you enrolled. It contains a personal key that starts with sk_sp_.
Copy it. You'll need it in a moment.
Don't have a key? Go to sp.strategicprofits.com/mcp/access and enter the email you enrolled with. Your key will be sent to your inbox.
Step B: Open a Terminal
Important: This command runs in a regular terminal window — NOT inside the Claude Code conversation.
If you have Obsidian open: Click the Claude logo on the left sidebar to open a terminal panel. If Claude Code is running in it, type /exit first, then run the command below.
Otherwise: Press Cmd + Space, type Terminal, and press Enter.
If you have Obsidian open: Click the Claude logo on the left sidebar to open a terminal panel. If Claude Code is running in it, type /exit first, then run the command below.
Otherwise: Click Start, type PowerShell, and click "Windows PowerShell."
Step C: Run This Command
Replace YOUR_API_KEY_HERE with the key from your email:
claude mcp add --transport http --header "Authorization: Bearer YOUR_API_KEY_HERE" --scope user sp-shared https://mcp.strategicprofits.com/mcpPaste it into your terminal and press Enter. You should see a confirmation message.
Step D: Restart Claude Code
The connection only loads when Claude Code starts up. Type /exit to close it, then type claude to start fresh.
Step E: Verify It's Working
In your Claude Code session, type:
Tell me my sp-shared statusYou should see your name, email, and a list of available content. That means you're connected.
If you see an error: double-check that you copied your API key correctly in Step C and that you restarted Claude Code in Step D. If it still doesn't work, email mail@strategicprofits.com.
Step F: Download Your Materials
Type this into Claude Code:
Sync my shared contentThis downloads your ZenithMind skills and resources directly into Claude Code. You can run this command again any time to check for updates.
You're Done When...
Start ZenithMind
You've got Claude Code and Obsidian installed and connected. Now it's time to download your ZenithMind folder and let Claude set everything up for you.
Pick Up Your ZenithMind Folder
Download from the Portal
▶Go to zenithpro.io and click the “ZenithMind OS 2026” card. Find the download button labeled Code and click it. A file named ZenithMind-OS-Code.zip downloads to your computer.
Tell Claude to Set It Up
▶Open a Claude Code terminal panel inside Obsidian (from Part 4) and type:
Run This Command
Claude handles everything — unzipping, placing the folder, verifying the contents. You don't need to do anything manually.
Remember Distinction #3 from Part 1? You bark the orders. Claude does the running. This is that in action.
Your First Session
Open Claude Code
▶If you installed the Terminal plugin in Obsidian (Part 4), open Obsidian and launch a terminal panel from there. Rich recommends this — your files, notes, and AI all live in one window.
If you skipped Part 4, open the Claude app and click the Code tab at the top.
Either way, Claude Code reads your ZenithMind-OS-Code folder and recognizes the system automatically.
First time only: Your browser may open to authorize Claude Code. Click “Allow.” This is normal — it connects your account.
Type "Let's start"
▶That's it. Type Let's start and press Enter.
Claude reads your folder, recognizes ZenithMind OS, and starts guiding you through Module 1. While this happens, glance at Obsidian on the side — you'll see files appearing there as Claude creates them.
Two Things Happening at Once
Claude greeting you in the Code tab, AND Obsidian's file list updating in real time. Both windows active = setup complete.
How the System Works
The Portal + Claude Flow
ZenithMind OS is 62 exercises across 4 modules. Here's the rhythm:
- Watch Rich's video on the ZenithMind portal
- Do the exercises with Claude — Claude asks the questions, saves your answers, and generates reports that reveal patterns you can't see on your own
- Watch the next video and repeat
Your folder is Claude's memory. Everything saves automatically. You don't need to manage files, organize notes, or keep track of where you left off.
Mirror Score
After each exercise, Claude generates a Mirror Score — a measure of how deeply the AI understands you based on your answers. It starts low and climbs as you complete more exercises. Think of it as a calibration metric: the higher the score, the more accurately Claude can think and write like you.
Sessions Pick Up Automatically
When you come back tomorrow or next week, open Claude Code — either from the Obsidian terminal panel or the Code tab in the Claude app — and type Let's continue. Claude reads your progress file and picks up exactly where you left off.
Troubleshooting
| Problem | Fix |
|---|---|
| I don't see any files in Obsidian | Make sure Obsidian is pointing at the ZenithMind-OS-Code folder (not the zip file). Click "Open folder as vault" and select the unzipped folder. |
| My Mirror Score went down | Normal. It recalibrates as Claude learns more about you. Deeper answers = temporary dips, then higher peaks. |
| I need a break mid-exercise | Just close the tab. Your progress is saved after every answer. Pick up with "Let's continue." |
| Claude seems off-track | Type "Let's refocus" and Claude will re-read your progress file and get back on track. |
| There's a new version of ZenithMind | Download the latest zip from the portal. Open your Code tab and copy-paste this: "I just downloaded a new version of ZenithMind to my Downloads folder. Update my install." Claude will back up your current data and apply the update automatically. |
| I want to start the experience over from scratch | Open your Code tab and copy-paste this: "I want to start ZenithMind completely fresh. Back up my current files, then reset my session progress and all my responses so I start from Question 1 with a clean slate." Claude will back up everything first, then clear your progress so the experience starts from the beginning — as if you just installed it. |
| Something else is broken | Email [email protected] with a screenshot and which step you're on. |
You're Ready When...
claudeZenithMind Plus
To access these skills, you must first complete Part 5: Program Materials. That step connects Claude Code to the SP shared content server and downloads your upgrade skills.
ZenithMind Plus includes everything in OS, plus 8 professional positioning skills that turn your Scorecard data into the assets every expert needs — your unique genius statement, your complete story kit, documents that sound like you at your best, situation-specific game plans, authority that lands in any room, a strategic relationship map, narrative control over how your field sees you, and an online presence that actually works as hard as you do.
Unique Genius Discovery
Most experts know they’re different but can’t say exactly how — and that gap costs them every time they pitch a client, introduce themselves, or write their about page. Using your Scorecard, Signature Profile, and Multi-Strength Integration from Lesson 4, it cross-references 20+ frameworks to find where they converge into the thing only you can do, then hands you a statement ready for your website, your pitch deck, and every bio you’ll ever write. Once you have it, the rest of your positioning stops being a guess.
Story Sharpener
Most professional bios could belong to anyone — “I help people transform their lives” describes every coach on LinkedIn and none of them in particular. Using your Scorecard, Signature Profile, and Personal Instruction Manual from Lesson 4, it produces a complete Story Kit: a 50-word bio, a 200-word about page, a 500+ word origin story, a keynote opening, and a 30-second elevator pitch — all grounded in your actual data, plus any additional format you need built from the same source. Every place your story needs to appear, it’s already written.
Signature Scribe
Most professionals write their most important documents and think they sound like themselves — then read them back and hear someone they barely recognize. Using eight behavioral frameworks from your Scorecard, Signature Scribe builds a Voice Calibration Map — how you argue, how you open, how you close — then uses it to produce any of 13 document types: keynotes, grant proposals, board presentations, recommendation letters, executive summaries. The version that comes back is the one that wins grants, closes rooms, and gets standing ovations — because it actually sounds like you at your best. Your voice, your logic, your rhythm — finally doing the heavy lifting.
Scouting Report
Most professionals walk into high-stakes situations with a general plan and a lot of hope — and leave having performed at 70% of what they were capable of. Using a short intake about your specific situation, Scouting Report reads your Scorecard and Signature Profile to produce a Situation Brief: what to lead with, what to avoid, your blind spots for this type of room, your opening move, and your recovery plays if it goes sideways. Your Scorecard knows what you tend to underuse under pressure — and this is where it tells you. Walk in with an unfair advantage instead of a general plan.
Credential Forge
Most professionals have more authority than they’re projecting — they just don’t know which credential leads in which room. Using your Scorecard and Signature Profile, Credential Forge identifies six authority angles specific to your background, then builds a deployment-ready Credential Kit for the exact context you’re stepping into: conference bio, board pitch intro, podcast setup, executive presentation. Stop being the best-kept secret in the building — walk in with the version of your authority that makes them take you seriously before you open your mouth.
Network Playbook
Most professionals network by volume — more coffee chats, more LinkedIn connections, more events — when the real leverage is in knowing exactly who matters and how to approach them. Using your Scorecard and Signature Profile, Network Playbook maps the people who actually shape your career — referrers, amplifiers, champions, collaborators, mentors — and shows you exactly how to approach each one. For each relationship type, your data tells you what language lands, what to lead with, and what to avoid — including where you’ll meet resistance before you do. The output is a Relationship Map and a one-page Playbook Card you keep on your desk. Stop buying coffee for people who can’t help you — start building the relationships that actually decide your next level.
Reality Check
Most professionals are managing at least one perception their field assigned them — and their Scorecard data would flatly contradict it. After a short intake, Reality Check maps the assumptions your world makes about someone in your role: what people believe, what’s actually true per your data, and the gap between the two. The output is a Perception Card — Belief, Reality, Your Move — that gives you a grounded reframe for every assumption working against you. Stop playing defense against a story that was never accurate — start controlling the narrative with the language to close the gap between how they see you and what you’re actually capable of.
First Impression Fix
Most professionals assume their LinkedIn profile and bio are fine because no one has complained — but “fine” doesn’t get you callbacks, referrals, or the click that starts a conversation. Paste in your LinkedIn about section, bio, or writing samples, and First Impression Fix audits every piece against your Scorecard and Signature Profile across four categories: ALIGNED (matches your data), MISMATCH (your data says one thing, you’re presenting another), MISSING (real strengths that appear nowhere), and OVERPLAYING (emphasizing signals that aren’t primary). The output is rewritten versions of everything you submitted — sharper, more powerful, built to make people actually reach out — plus an Identity Card. Your online presence, finally working as hard as you do.
Proximity Architect
Most people operate without a local circle that actually gets what they’re building — colleagues who are working at the same level, thinking about the same problems, and building the kind of trust that only happens in the same room. After a short intake of your location and context, Proximity Architect researches and maps the communities, meetups, coworking spaces, and connectors in your area that match where you’re headed — not generic networking events, but rooms full of people who are operating at your level. It also works for travel: tell it where you’re landing and when, and it surfaces the right rooms in that city before you arrive. Stop building alone.
How to Get Your Plus Skills
Go to zenithpro.io and click the “ZenithMind Plus” card:

Download the Plus skills zip and drop it into your ZenithMind folder. When you’re ready to use a skill, just tell Claude which one to run — it reads your Scorecard and Signature Profile automatically.
Note: The upgrade skills analyze data from your ZenithMind OS exercises, so they’ll be most powerful after you’ve completed the base program. But you can download everything now so it’s ready to go.
ZenithMind Elite
To access these skills, you must first complete Part 5: Program Materials. That step connects Claude Code to the SP shared content server and downloads your upgrade skills.
Everything in OS and Plus, plus the complete business operating system. Not a course — deployed tools that let one person research, position, create, and sell at a level that used to require a team. Each tool below is a full description of what it does and why it matters.
Ground ZenithMind in Your Business
ZenithMind Elite comes with two grounding skills that set up your business vault before you deploy the tools below. Both downloaded automatically when you completed Part 5: Program Materials. OS and Plus members don’t get these — this step is Elite-only.
Profile Interview
A 20-30 minute conversational interview that captures who you are, what you’re responsible for day-to-day, the tools you use, your team, your documents, your pain points, and your goals. Claude uses the answers to design your vault structure and write your CLAUDE.md configuration. Not a form — a real back-and-forth where specifics drive follow-up questions. Progress saves after each section, so you can step away and resume.
Run This Command
Creates: 00 System/CLIENT-PROFILE.md • auto-saved progress at 00 System/logs/_interview-progress.md
File Discovery & Vault Population
Takes the profile you just built, proposes a vault structure tailored to your responsibilities, scans your Desktop / Documents / Downloads for relevant files, converts them to Markdown, and places them in the right folders. 60-90 minutes, can be split across sessions. Ends with a generated CLAUDE.md so every future Claude session already knows who you are before you type a word.
Run This Command
Creates: Custom numbered folders (02+) • converted Markdown docs • 00 System/VAULT-SUMMARY.md • 00 System/CLAUDE.md
Run them in order. File Discovery reads the profile you create in the Interview — do the Interview first, then File Discovery. Every Elite tool below reads from these two files and gets sharper the more grounded your vault is.
Profile-Powered Skills
These read directly from your ZenithMind Scorecard and Lesson 4 outputs. They turn your profile data into business assets.
Client Compass
Knowing what makes you irreplaceable is one thing — knowing exactly who needs it and why they’ll pay for it is another. Using your Scorecard, Signature Profile, and Execution Bridge from Lesson 4, it maps your ideal client at a psychological level — their beliefs, their struggles, the exact language they use, and the criteria that separate the right clients from expensive mistakes — plus a one-page Client Compass Card you keep open on every discovery call. You stop marketing to a demographic and start speaking directly to a real psychological profile that came entirely from your own data.
Prospect Primer
The most exhausting part of selling isn’t closing — it’s the 45 minutes you spend convincing someone they have a problem before you can even pitch the solution. Using your Scorecard, Signature Profile, and Execution Bridge from Lesson 4, it builds a complete prospect-facing assessment — questions, scoring, and result interpretations — that runs on your website, in your intake form, or as a lead magnet without you present. Prospects score themselves against the dimensions your 4 lessons proved you’re strongest in, see the gap themselves, and arrive at your call already sold — and it keeps running whether you’re working or not.
Content Forge
Most entrepreneurs create content in bursts — furious output for a week, then silence, then guilt, then repeat — because they’re generating from scratch every time instead of from a system. Using your Scorecard, Signature Profile, Personal Instruction Manual, and Execution Bridge from Lesson 4, it produces 30 days of ready-to-post content — posts, emails, and video scripts — written in your voice and multiplied into 50–80+ derivative pieces, with a weekly workflow and multiplication system so the 30 days never really ends. You don’t get a content batch — you get a content operation.
IP & Expertise Tools
Extract, name, and package the expertise you’ve been building for years into assets that appreciate every time you deploy them.
Personal Brand DNA Extractor
Most AI-generated content fails the moment it gets published — not because the model isn’t powerful, but because it has no idea who you are, so it defaults to the average of everyone. This tool reads your existing materials — courses, emails, recorded calls, testimonials, origin documents — and extracts eight data files: voice and tone, credentials, client transformations, origin story, philosophy, and avatar profile. Load it once and every tool downstream stops writing for a generic expert and starts writing for you. That difference shows up in the first sentence of everything you produce.
Distinction System
Every expert has insights that took them years to develop that they now deliver in a single sentence — and most of those insights have never been named, structured, or made teachable. They live in transcripts, in offhand coaching moments, in the way you explain something for the twentieth time slightly differently and finally nail it — and then it’s gone. This tool reads your raw materials, surfaces the distinctions buried inside them, builds each one into a complete teaching unit, and generates the microscript — the quotable one-liner that makes the insight portable. Your IP has been compounding for years. This is how you finally own it.
Framework Forge
The way you think through a problem — your instinctive sequence, the steps you run through before you’d ever say you’re running steps — is a methodology. Most experts never extract it because it doesn’t feel like a methodology from the inside, it just feels like thinking. This tool mines your existing content for those patterns, identifies the repeatable structures, builds them into named frameworks with complete supporting materials, and generates the names. One solid framework becomes a course module, a book chapter, a keynote, a consulting engagement — a single asset that appreciates every time you deploy it. This is how thought leaders stop selling time and start selling systems.
Mechanism Ideator Enhanced
Every offer that converts has a mechanism. “I’ll help you grow your business” is forgettable in three seconds. “The [Specific Mechanism] that produces [result] by [method no one else uses]” makes people stop scrolling — and most experts never build one because they assume what they do is self-evident. This tool generates mechanism candidates for your offer, scores each against four criteria — surprise value, credibility, resonance, and differentiation — then builds research packages for the top candidates with proof, academic support, and case studies. You leave with scored, researched mechanism candidates ready to install — and the one that’s most yours is obvious by the time you’re done.
Research & Strategy
Make better decisions faster. These tools replace hours of manual research and guesswork with systematic analysis.
Deep Research
Three hours. Nine tabs. Contradictory answers in different formats from different models with different blind spots — and you still don’t have a clear answer. This tool sends one question to nine sources simultaneously — Perplexity, Gemini, Claude Deep Research, OpenAI, Manus, Tavily, Exa.ai, xAI Grok, and others — then synthesizes everything into one coherent report in minutes. Run it before any major copy decision, any market entry, any strategic move where being wrong costs more than the time it takes to get it right.
Theory of Constraints
Every business has exactly one constraint limiting everything else — one bottleneck that, if removed, would improve throughput across the entire system — and almost no one is working on it. They’re optimizing the wrong things, putting genuine effort into changes that produce zero improvement because the constraint sits somewhere else entirely. This tool runs a 15-minute diagnostic conversation, identifies the specific bottleneck in your actual business — not a category, the real thing — and delivers three concrete moves for this week. Run it when growth has plateaued, when you’re stuck, or before your next major strategic push.
Constraint Portfolio
Most entrepreneurs know which product makes the most money. Almost none know which one makes the most money per hour of their time — and the gap between those two answers is usually where the real problem lives. This tool takes your full product lineup, calculates throughput-per-founder-hour for each product, and ranks them. The results consistently reveal that your highest-revenue product is your worst investment of your scarcest resource, and the smaller offer you’ve been neglecting is quietly the most efficient thing you do. You get a ranked portfolio with a clear verdict on each product — and the decision about where your energy belongs stops being a feeling and becomes a number.
Strategic Builder
Most projects fail not because the person executing them isn’t capable, but because they were started without proper setup, run without defined checkpoints, and finished without a deployment plan — so they get done but never actually go live. This tool installs an 8-phase project lifecycle methodology from scoping through archiving that prevents the failure modes that kill otherwise good work: scope drift and builds that sit complete but never deploy. Use it at the start of any major build — the ones where incomplete means the whole investment evaporates. It’s not a project management tool. It’s a completion system.
Copy & Conversion Engines
The same competitive systems Rich uses before every major launch — now running in minutes instead of weeks.
Copywriting Arena
Most copy fails not because the writer is bad, but because they committed to one approach before they knew which one would work — and by the time the results are in, the budget is spent. This tool runs your brief through five proven copywriting methodologies simultaneously — BJ’s Empathy-First formula, CJ’s Bar-Room Direct Response, DD’s Meaning-Making framework for high-ticket transformation, AE’s Invisible Structure built around one core belief, and Clayton Makepeace’s system of 29 emotions, 13 proof strategies, and a 10-step close. Critics evaluate every draft. A marketplace judge picks a winner. A synthesis combines the strongest elements from all five. You walk away with five finished drafts, a declared winner, and one unified piece — the same stress-test process Rich uses before every major launch, now running in minutes.
Webinar Arena
Building a webinar on one methodology is a bet — and most people don’t know if they’ve picked the right one until the live event tells them. This tool writes six complete webinars from your brief simultaneously, each using a different proven structure: Russell Brunson’s Perfect Webinar, Jason Fladlien’s micro-commitment system, Frank Kern’s help-first blueprint, Michael Cage’s four-act Teleseminar structure, Peng Joon’s Event Codex, and Dan Kennedy’s direct response foundations. Critics evaluate every draft. A marketplace judge picks a winner. A synthesis pulls the best elements from all six into one unified presentation. What used to require six copywriters, weeks, and a five-figure budget now runs in one session.
How to Get Your Elite Tools
Go to zenithpro.io and click the “ZenithMind Elite” card:

Download the Elite package and drop it into your ZenithMind folder. All upgrade skills and business tools are included — just tell Claude what you need.
Note: The profile-powered skills analyze data from your ZenithMind OS exercises, so they’ll be most powerful after you’ve gone through the base program. The business tools (Arena, Deep Research, Framework Forge, etc.) work anytime. Download everything now so it’s ready when you are.